Our ancestors were so much more than the names and dates that appear on a typical family tree. What did they do for a living? Where did they go to school? What was their religious affiliation? Their favorite food? These types of details may not seem essential, but the more information you add about each of the people in your family tree, the richer a picture of them you paint for yourself and for future generations.
Grow your family tree on MyHeritage
Did you know that you can add these and many more details to each person’s profile on your family tree on MyHeritage? In this article, we’ll show you how to enrich your relatives’ family tree profiles with everything you know about them.
Editing more details
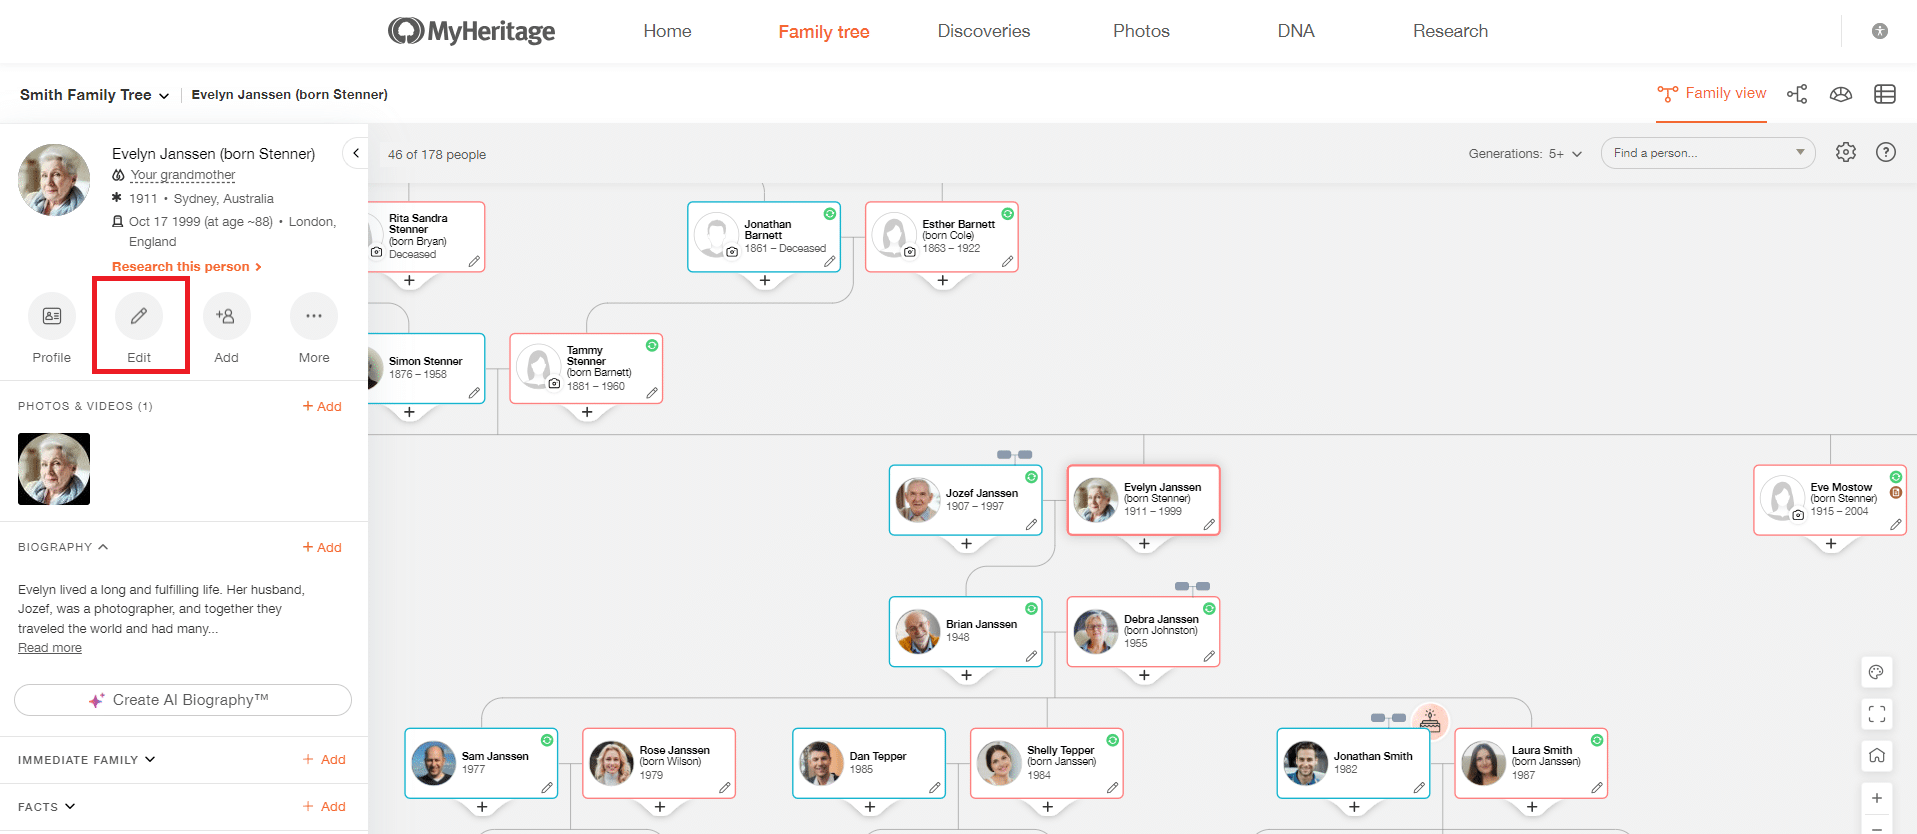
To edit or add more details to a person’s profile in your tree, click that person’s card in your family tree to open the left-hand profile panel. Then, click the “Edit” button beneath their photo, name, and basic details:
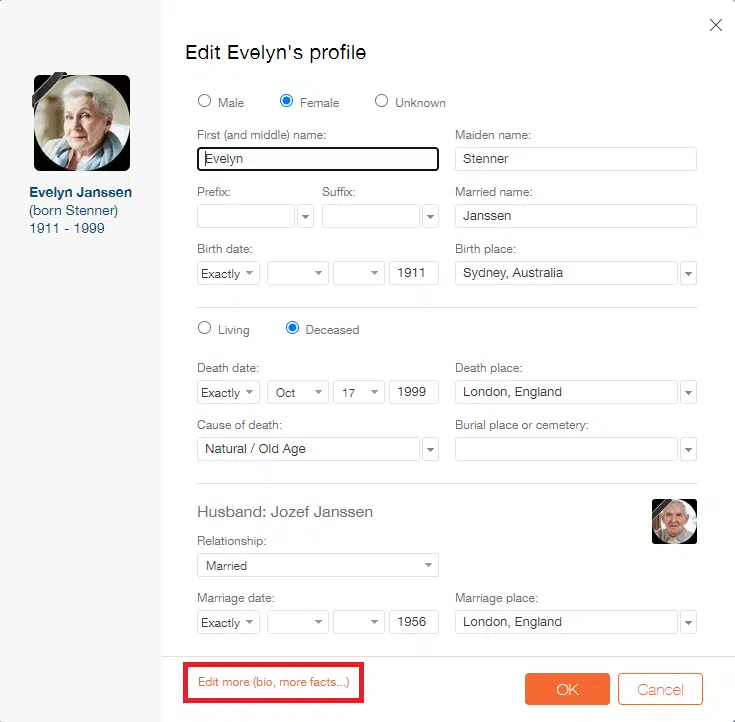
This will open a pop-up window where you can add or edit some basic facts, including the person’s name and some details about their birth, death, and any marriages.
To access the full profile editor, click the “Edit more” link on the bottom left of the window.
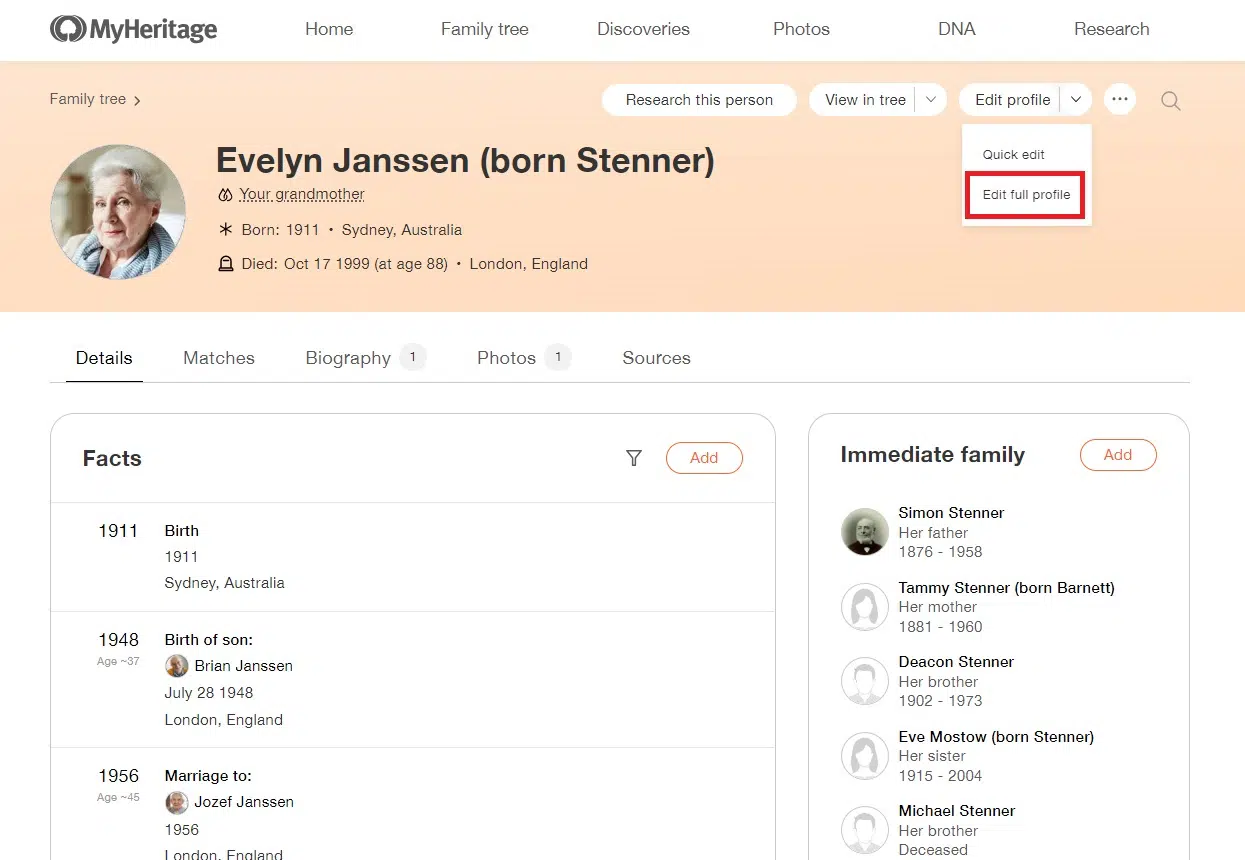
You can also access the full profile editor from the profile page: click the arrow next to “Edit profile” at the top right and select “Edit full profile”:
Navigating the full profile editor
The full profile editor contains 10 sections:
- Essentials
- Family
- Biography
- Contact info
- Work
- Education
- Favorites
- Personal info
- Source citations
- All facts
You can navigate between the sections by clicking on them in the left-hand sidebar. You can also click the “Save & continue” button at the bottom of each page to save any information you’ve changed in that section and move on to the next one. Clicking “Save & close” will save the information and take you back to your family tree. Note that if you add or change any information in any of the sections, you’ll need to save it before moving to a different section.
Essentials
The essentials section contains information on the person’s gender, name, birth, and death.
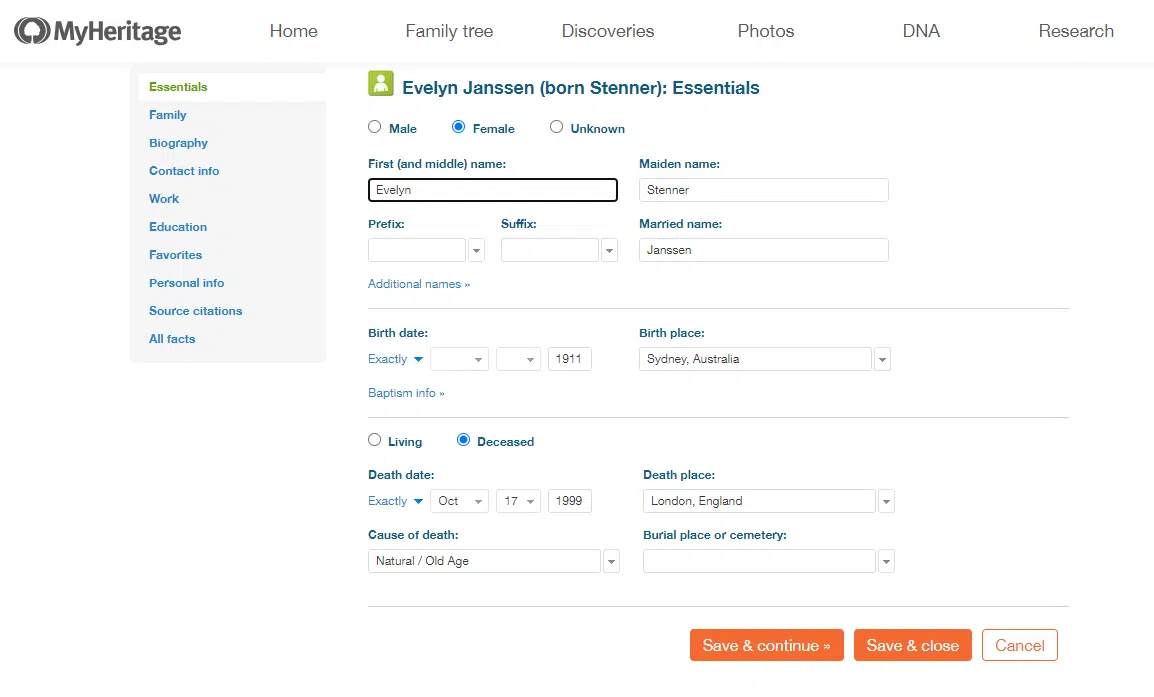
In addition to the first, middle, maiden, and married names as well as prefixes and suffixes, clicking “Additional names” opens a section where you can enter a religious name, former name, or nickname, and even select a relative this person was named after.
In addition to the birth date and place, you can add baptism information, including the date and place of the baptism and the names of any godparents.
Family
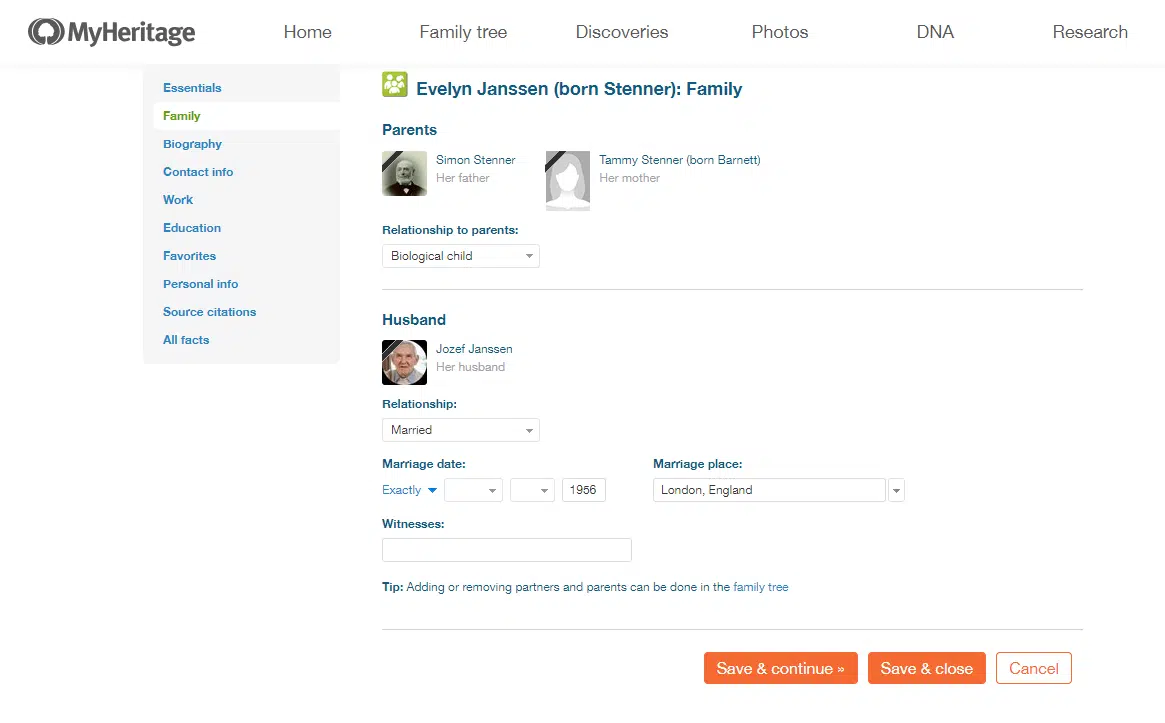
In the family section, you can view this person’s parents and select their relationship type (biological, adoptive, or foster). (See Adding an Adopted Child to a Biological Family Tree for more ways to indicate adoptive relationships in your tree.) You can also view details on any marriages this person had, and in addition to the relationship and marriage date and place, you can enter the names of the witnesses.
Biography
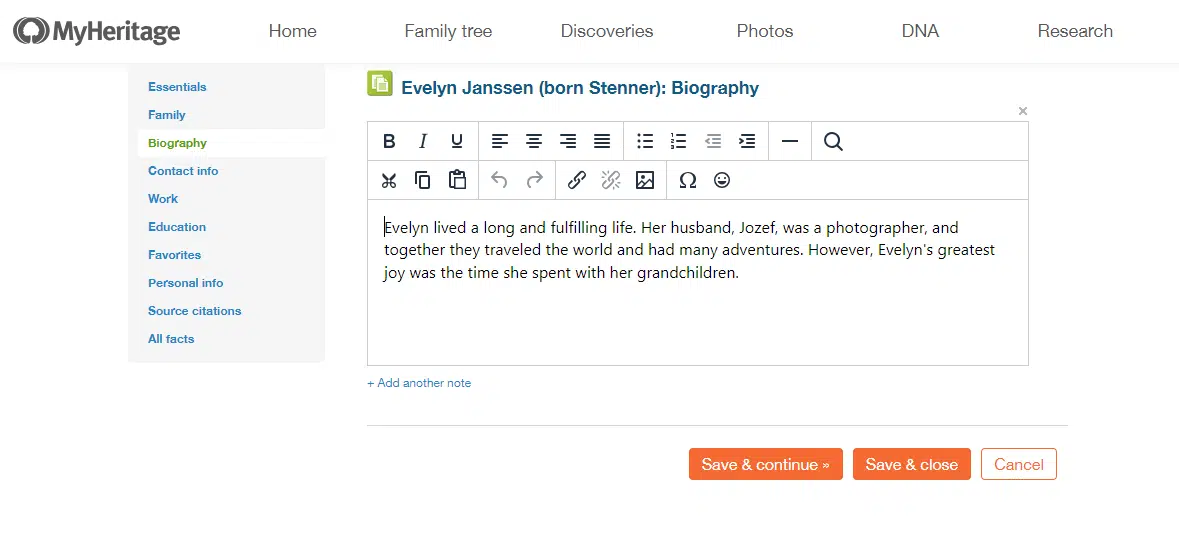
The biography section is the place to add whatever you know about this person’s life story. You can write as little or as much as you like and include formatting, links, and more. This is also a good place to include any notes on your research of this person, for example if there are unresolved questions, conflicting information from different sources, and so on. If you’d like to keep your research notes separate from the biography, you can click “Add another note” below the text box. For more on using the biography feature, see Memorializing Ancestors with Bite-Sized Bios on MyHeritage.
Contact info
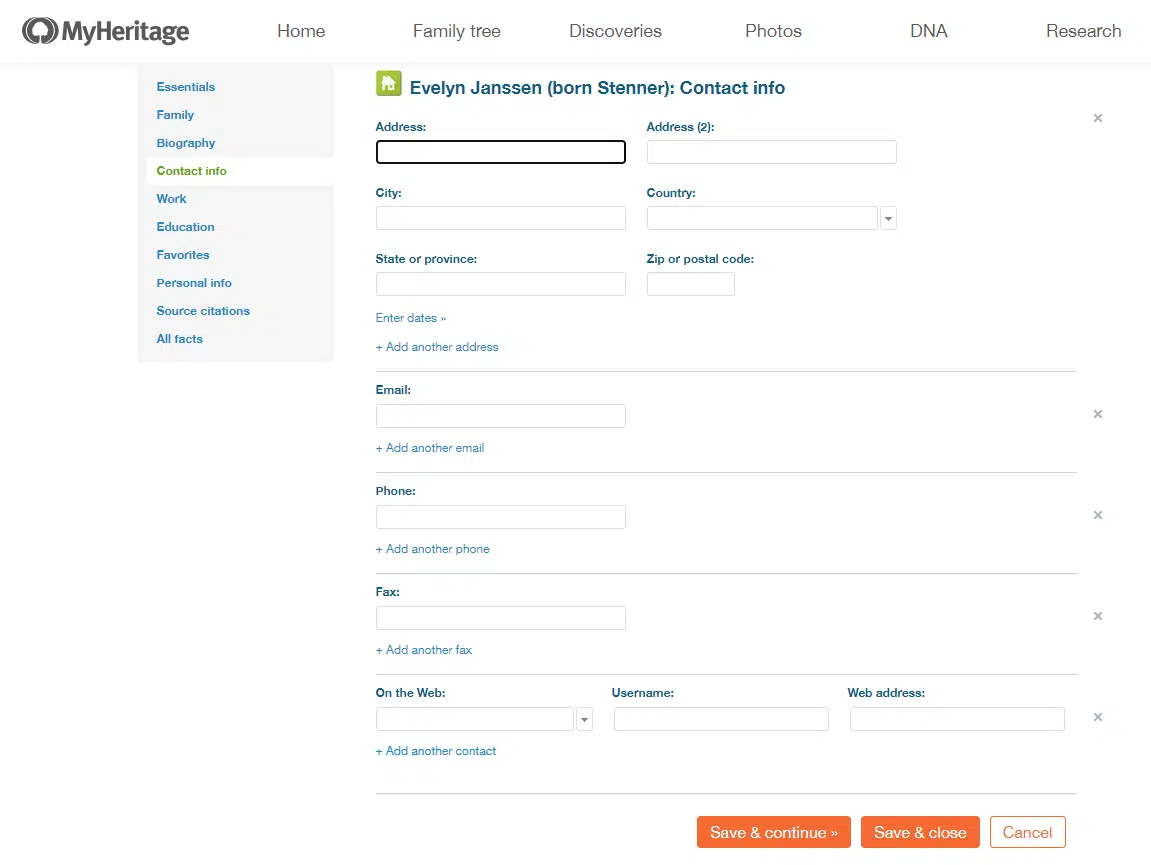
The contact info section is useful for keeping track of how to get in touch with living relatives. Here you can add any addresses, email addresses, phone or fax numbers, websites, or social media profiles associated with this person.
Work
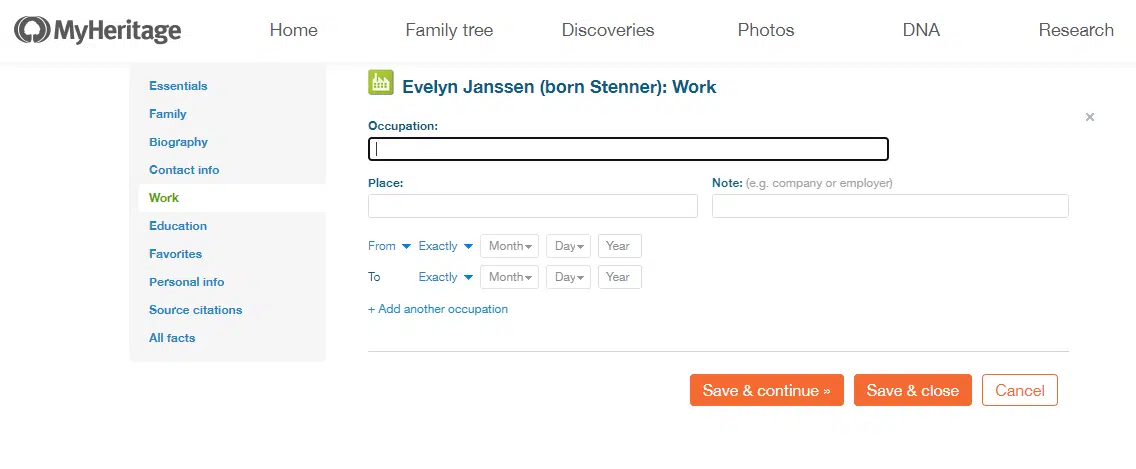
In this section, you can add information about this person’s work history, including their occupation, place of work, any notes about the work, and when the person worked in this profession. If the person worked in multiple professions, you can add more by clicking “Add another occupation.”
Education
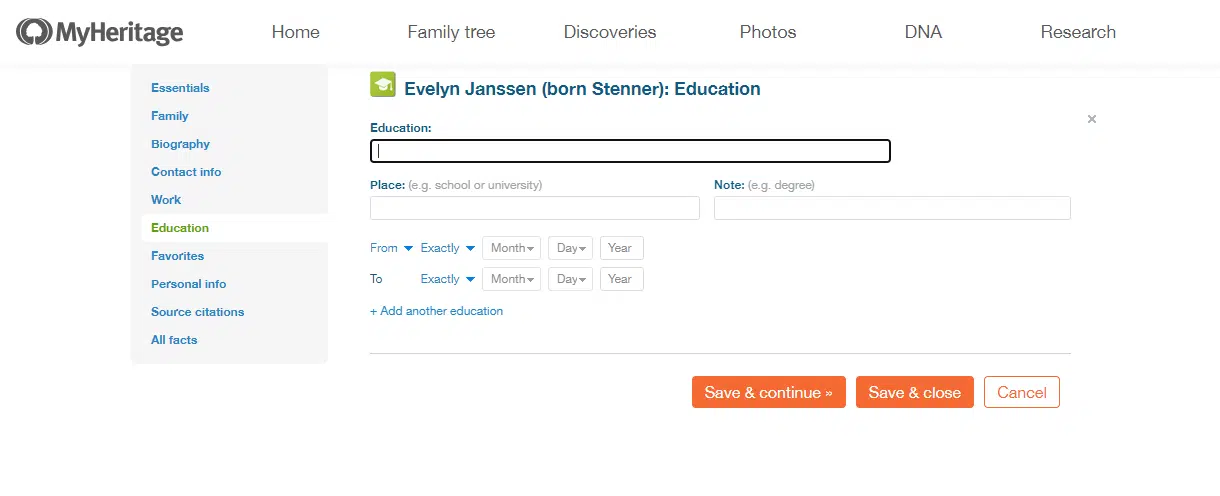
In the education section, you can add any information about this person’s schooling: the type of education (for example: elementary school, high school, university, trade school), the name of the institution, any notes (for example, the subject of a degree or diploma), and the time when the person attended this institution. If the person attended more than one school, you can add more education information by clicking “Add another education.”
Favorites
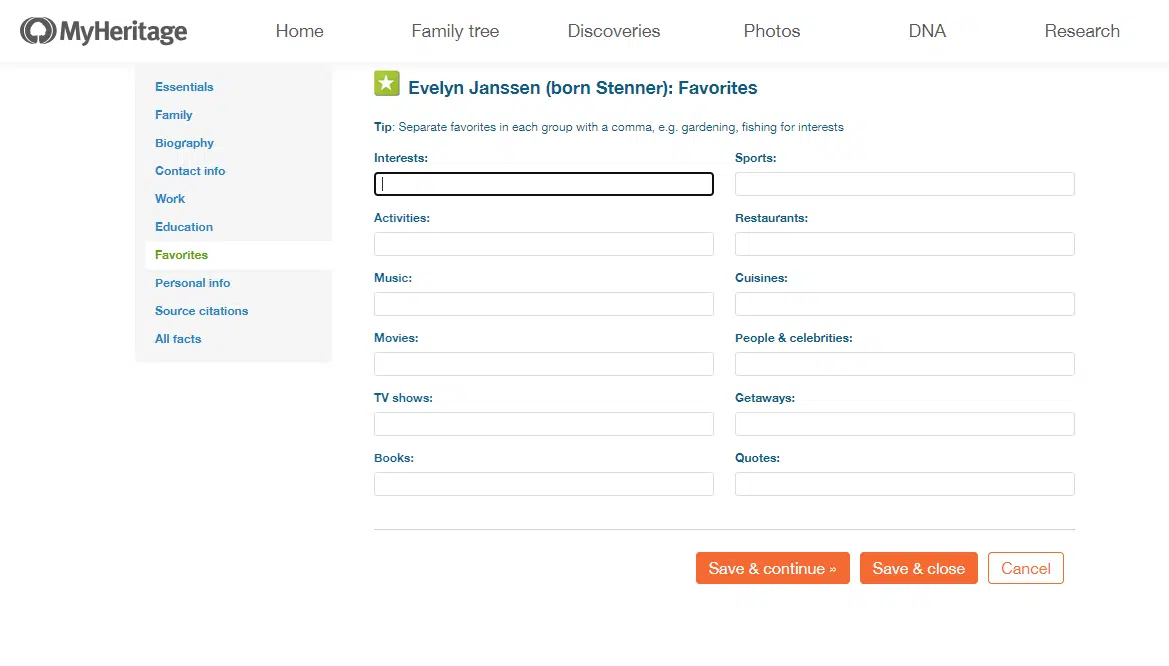
In the favorites section, you can indicate this person’s favorite interests, sports, activities, restaurants, cuisines, movies, people and celebrities, TV shows, getaways, books, and quotes. Filling out this section is a great way to help future generations get to know this person better and gain insight into their tastes and personality.
Personal info
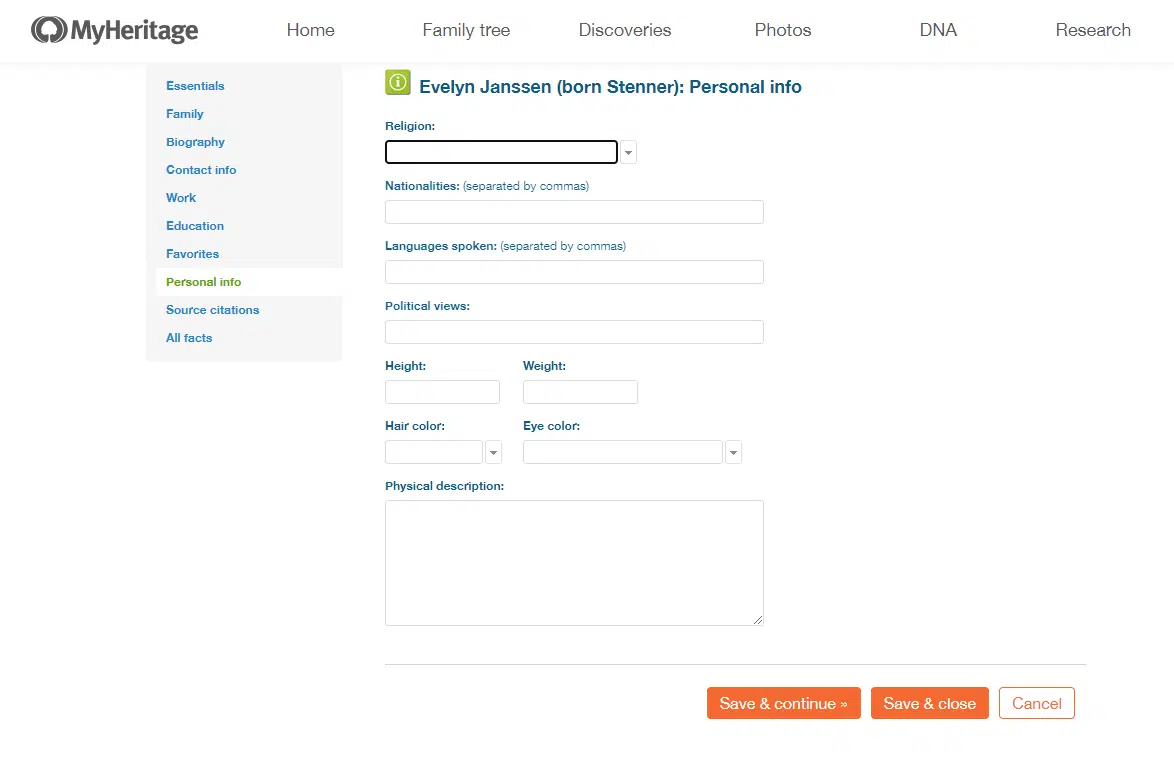
In the personal info section, you can add details such as this person’s religion and nationalities, the languages they spoke, their political views, and physical traits such as height, weight, hair color, eye color, and a physical description. Physical descriptions and details about traits sometimes appear in certain types of records, such as military records, and they can be recorded here.
Source citations
Citing your sources is crucial for maintaining the accuracy of your tree and being able to retrace your steps. In the source citations section, you can add sources for the general information you have about this person. Note that in the following section (“All facts”), you’ll be able to add source citations for each fact. So if your general source of information about this person is your personal relationship with them or an interview with a specific relative, you can add that here. If you learned a specific fact from a specific source — for example, details about this person’s immigration from a naturalization record — it’s best to add that in the next section.
When listing a source citation, first select the source, or add a new one. Note that when you add information to a profile from a Smart Match™ or Record Match, that source (i.e. the family site with the matching tree or the record collection) will be automatically listed and saved as a source. To add a source, click “Add new source” and fill out as many details about it as you can. You can even upload files related to the source, such as a photo, scan of a document, or audio recording.
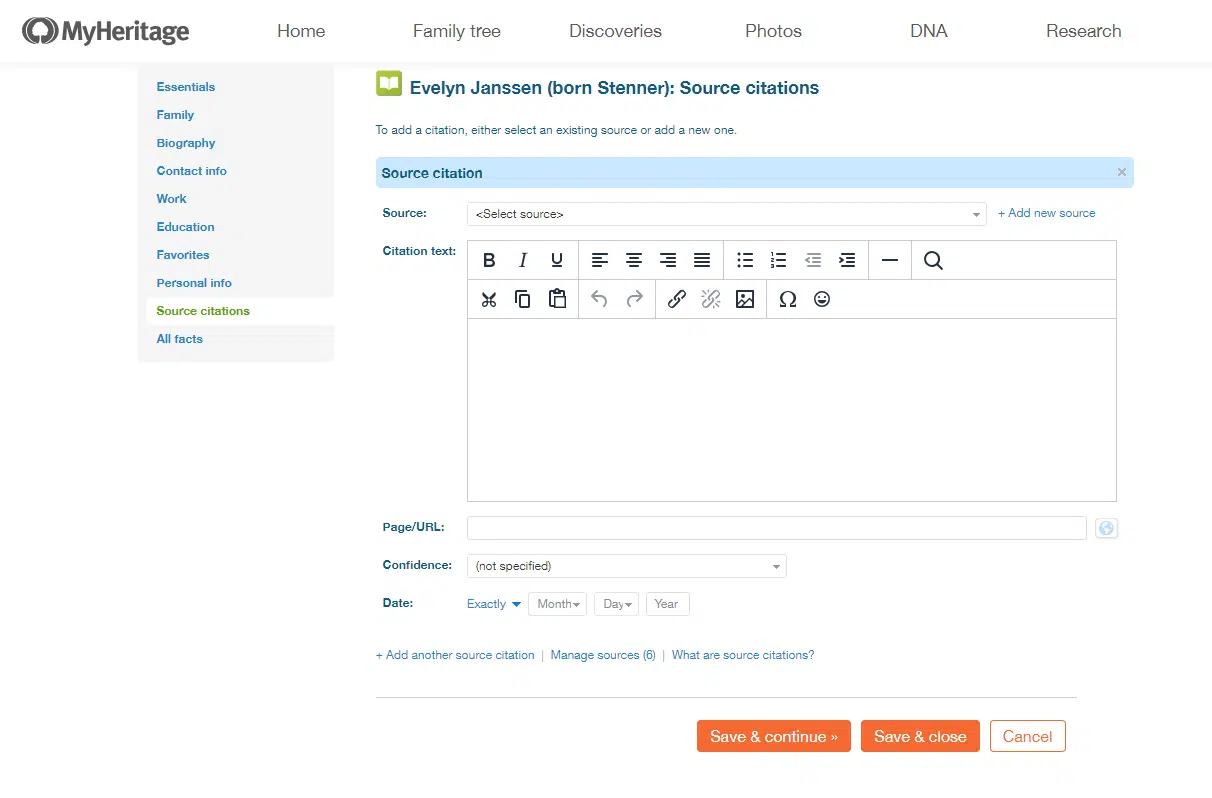
Learn more about source citations here: Citing Genealogy Sources: Why & How to Add Source Citations
All facts
In this section, you can add information about all life events and facts related to this person. This is the place to expand upon aspects of this person’s life that weren’t covered in previous sections: anything from military service or immigration to awards, retirement, membership to organizations or societies, and much more. Click “Add another fact,” then select a fact category and type or enter a fact type into the search box to select one.
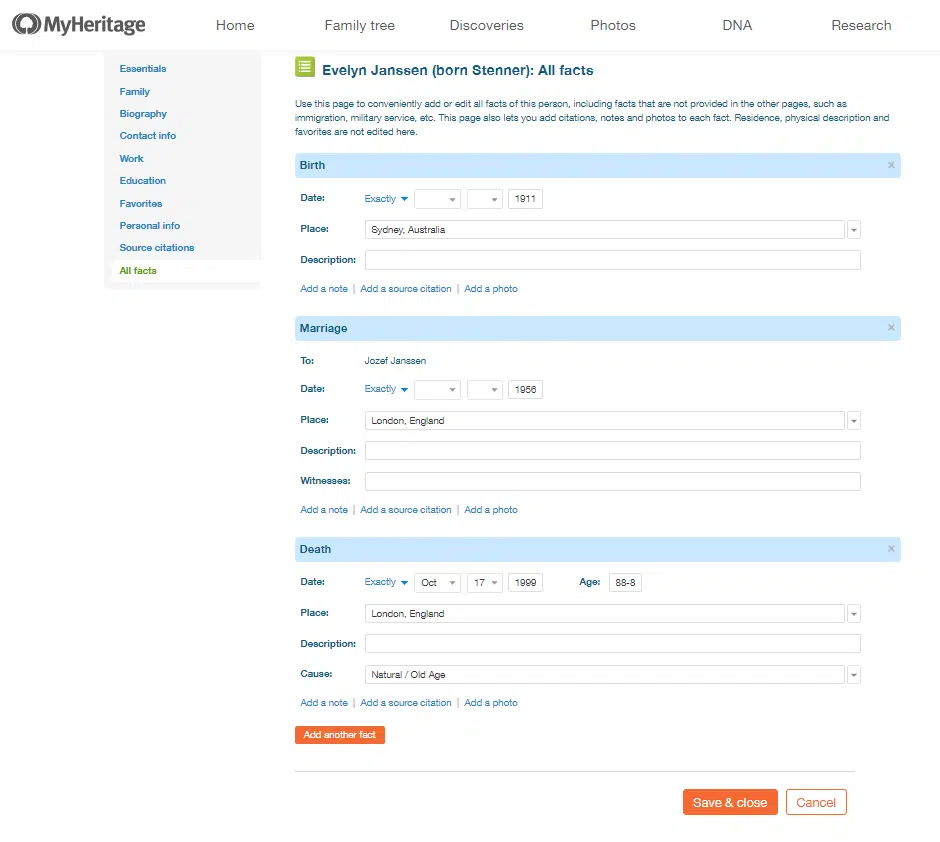
Each type of fact provides different fields that are relevant to that fact. You can also add notes, source citations as mention above, and photos related to that fact.
Don’t forget to click either “Save & continue” or “Save & close” at the bottom of the page when you’re finished!

