
Digitizing your photos means giving them a new life. It ensures the photos will be around for generations to come even if the print versions deteriorate. It also enables you to share them easily, enlarge them, and enhance them in ways you would never be able to with prints. However, scanning photos can be very time-consuming if you have albums full of photos that you’d like to digitize. Many people find themselves with albums and boxes of beloved photos they would love to scan, but just haven’t been able to find the time. While scanning photos with mobile devices has become a quick and easy option, doing so one by one can be incredibly labor-intensive.
Enter the Reimagine photo scanner!
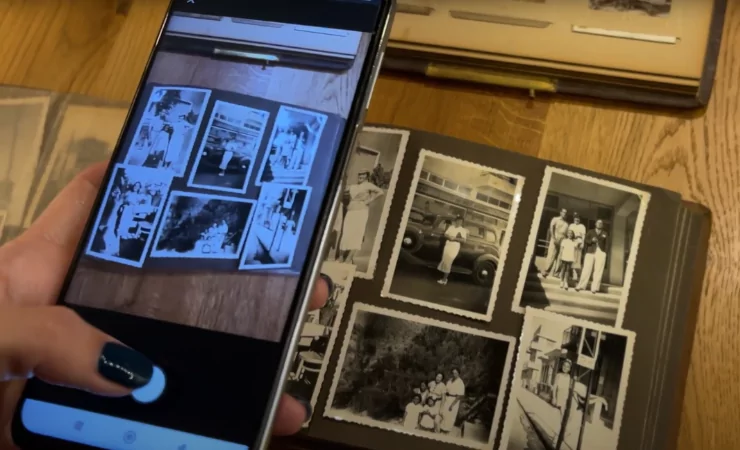
The Reimagine app allows you to create high-quality scans of multiple photos in a single tap. Leveraging smart AI technology, it identifies multiple photos, crops them out, and saves them as individual images. Using the Reimagine photo scanner, you can scan entire photo albums in mere minutes. Learn how in the short video below:
In this article, we’ll provide a number of tips and pointers to help you create beautiful, high-quality scans of your photos using Reimagine.
1. Use a device with a good camera
The better the camera you use, the higher-quality your scans will be. Most mobile phones available today have powerful cameras that can produce excellent scans, but if you have several devices to choose from, pick the one with the best camera. Simply download the Reimagine app onto the device and sign in with your MyHeritage account.
2. Find the right spot
Placing your album directly under a light source can add glare, shadows, or reflections to your scans, especially if the photos have a glossy finish or are covered with a protective plastic sheet. Find a spot with soft light where you can lay your album flat and hold your camera comfortably over it. You may find that the floor works better than a table or desk.
3. Lay the page flat
If the page isn’t lying flat, some of the photos may come out distorted or out of focus. If you’re having trouble laying the page flat, you can try weighing down the corners, or even placing a clear pane of glass on top to hold it flat. The bottom of a large, very clean glass casserole dish might do the trick!

4. Keep your device steady
Camera movement can result in blurry photos — and it’s always better not to rely on the Photo Enhancer to sharpen them if you don’t have to! If you have trouble holding your hand steady while tapping the Scan button, try propping your elbow on a desk or chair. You can also use a small, inexpensive tripod to hold your phone for you.
5. Place the camera close to the page, at a parallel angle
Place the camera as close to the page as possible while still keeping the photos you wish to scan within the frame. The closer you are to the photo, the higher the resolution on the final scan will be. A tilted camera might cause distortion, so try to hold the camera as parallel to the page as possible.
You can hold your device vertically or horizontally, whichever works best. The software will automatically detect the correct orientation of the photos and rotate them accordingly.
6. Fine-tune the cropping and orientation
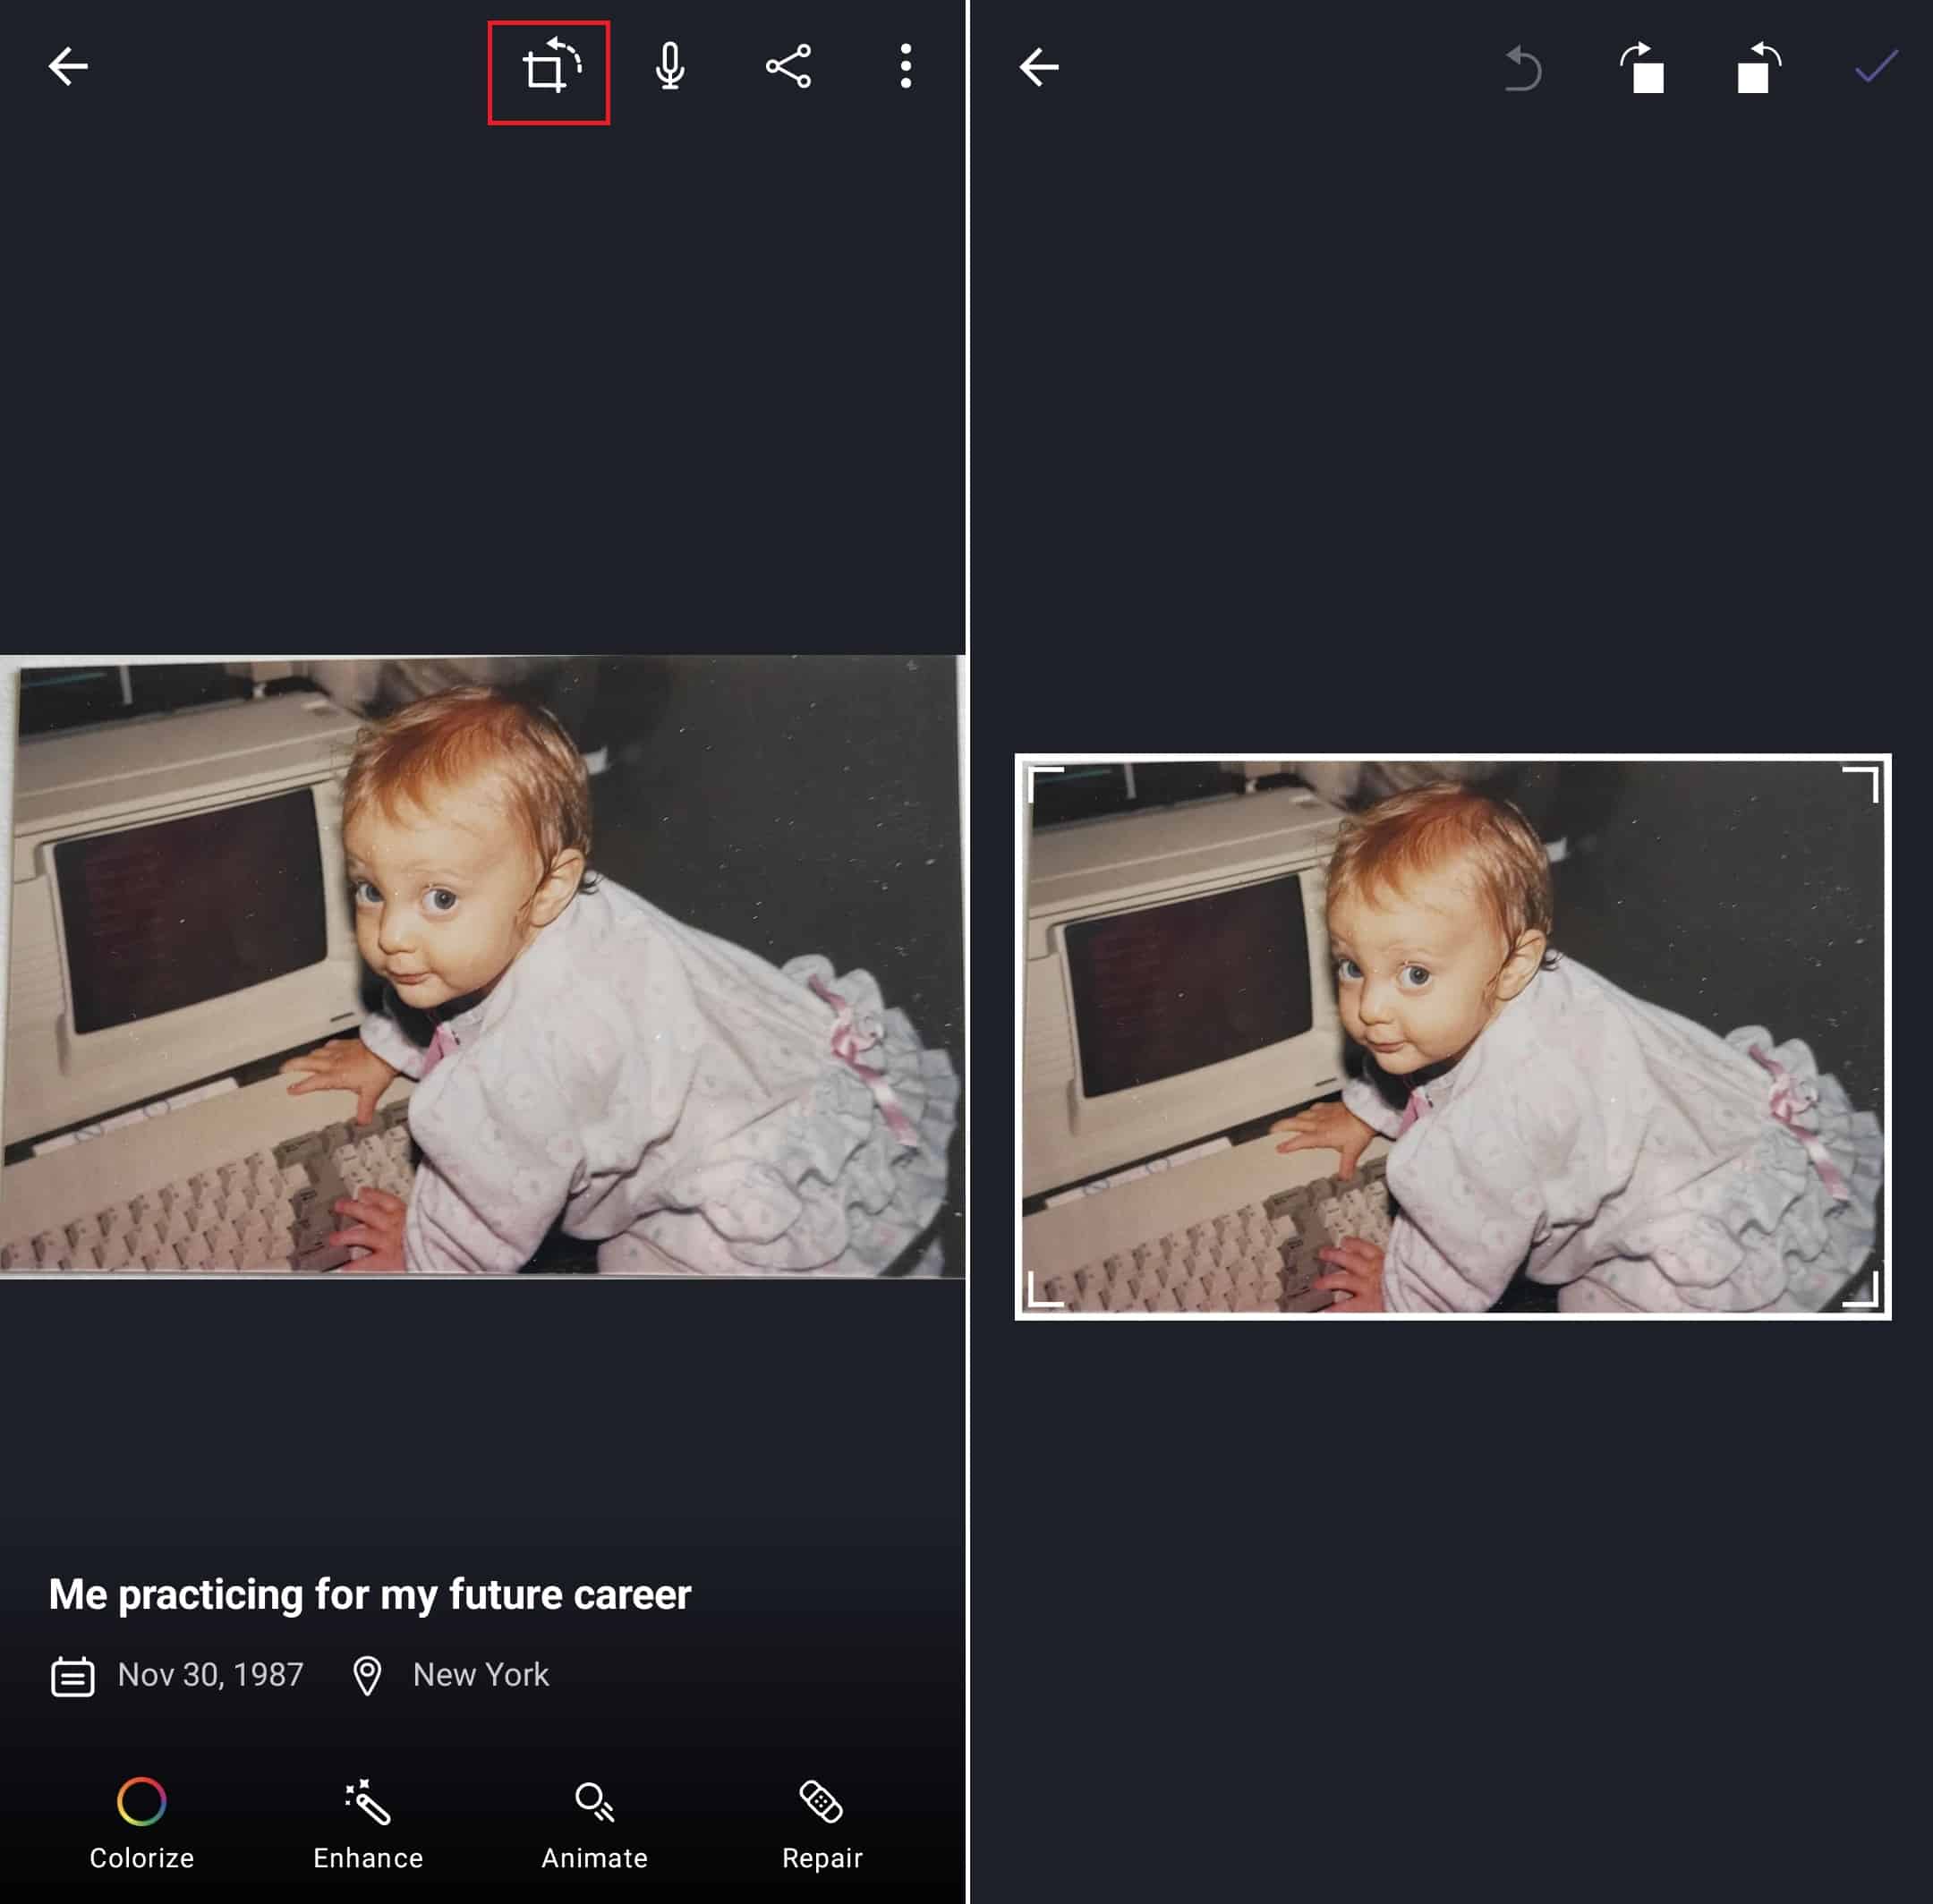
The Reimagine software does an excellent job of detecting the edges of your photos and their orientation and cropping them out correctly. However, it may not always crop them seamlessly and may sometimes orient them incorrectly. You can quickly and easily fix this after you’re done scanning the album. Just open the photo and tap the cropping and rotating icon on the upper right. Once in editing mode, you can drag the corners to crop the photo, or tap the icons on the top right to rotate it. When you’re done, tap the checkmark on the upper right corner.
Once you’ve found a good set-up and gotten into the groove, you should be able to breeze through the rest of the album in minutes. Simply flip the page, flatten it, position your camera, tap the button, and flip to the next one until you’re done.
Then, you’ll be free to enhance, repair, colorize, restore colors, or animate your photos with the tap of a button! Read more about what Reimagine can do in the following article: The Reimagine App: The Best Solution for Scanning & Improving Family Photos
Download the Reimagine app on the App Store or Google Play and get scanning!