Making a family tree is the first, foundational step on the journey to discover your family history. As you explore and enrich your knowledge about your family’s past, the family tree becomes the backbone of your research, enabling you to plot out and understand the relationships between your relatives.
If you’re never created a family tree before, it might sound complicated, but it’s easier than you think.
MyHeritage makes it a breeze to start building a family tree. Try it now!
Family trees can take many different forms, and how you choose to make one depends on your goals. In this article, we’ll discuss creating a family tree for genealogical research purposes.
Quick guide: How to create a family tree in 4 easy steps
1. Start with yourself
Begin your family tree by adding your own details: your full name, date and place of birth, and a recent photo if you have one. You are the foundation of your tree, so it’s the best place to start your journey into your family’s past.
2. Add your first-degree relatives
Next, include your parents, siblings, spouse, and children. For each person, try to add key details like birth, marriage, and death dates and locations. A photo can bring each profile to life. These are the basic building blocks of any family tree and help form a clear structure.
3. Add distant relatives
Expand your tree by including grandparents, aunts, uncles, and cousins. Think of all the relatives you’ve heard about and add what you know. Even small bits of information can be valuable and may help uncover new family connections as your tree grows.
4. Fill in missing information
To complete the picture, ask older relatives what they remember, look through official records, or use a genealogy platform like MyHeritage to discover more. Each piece of information you add helps preserve your heritage and brings you one step closer to your roots.
Getting Started: How to draw a family tree
Before you begin sketching out the tree, it’s a good idea to write down the names of the people you wish to include in the tree. This will give you an idea of how big the tree will need to be and how to map it out.
Where should you start your family tree?
When you’re ready to start drawing your tree, start with yourself: write your name towards the bottom of the page, leaving room to add your own kids and grandkids if you have them. You might like to add a birth date and place as well.
How do you add parents to your family tree?
Next, add your parents’ names and details above yours. Typically, the father is placed on the left and the mother on the right, but it doesn’t really matter, as long as the order is consistent throughout the tree.
What do the lines mean in a family tree?
The lines on a family tree indicate the different types of relationships. A horizontal line connects people from the same generation, while a vertical line connects parents to children. A solid line drawn between two individuals indicates a marriage, while a dotted line indicates a divorce or separation.
How do you add siblings to your family tree?
Draw a line between your parents. Then, draw a vertical line to you from the line connecting them. If you have siblings, add their names next to yours, and draw a horizontal line above your names, then vertical lines to connect each of your siblings. At this point, your tree will look something like this:
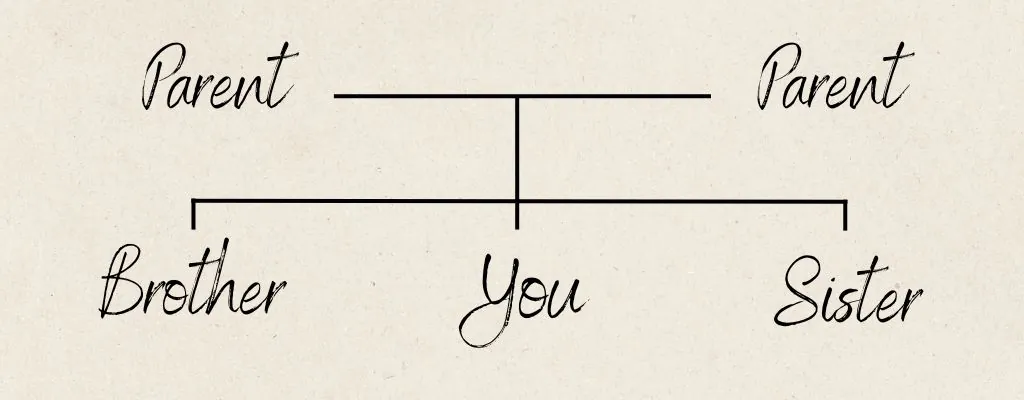
Now add parents and siblings for each of your parents the way you did for yourself: your grandparents above each of your parents with lines connecting them to each other and to their children. Repeat this step for additional relatives to fill out the tree.
How do you add grandparents and earlier generations?
As the tree grows, you’ll quickly find that things start to get complicated: how do you fit in all your uncles and aunts with their spouses and children? You may need to start over a few times to find the right format to fit all the family members you wish to include in your tree. Even so, as soon as you expand the tree to include more than 3 or 4 generations, or cousins of increasing degrees, you’re eventually going to run out of room on the page.
Why should you consider building your family tree online?
There are many advantages to building a family tree online. An online tree is kept safe and accessible from anywhere, and you can print as many copies of it as you like. It’s also much easier to edit and add to your tree online, because space on the page is no longer an issue. You can even create full, detailed profiles of each family member, including photographs, historical records, stories, and more. Additionally, when you build a family tree online, you can share it and collaborate with family members. Family tree building websites like MyHeritage also offer advanced features that help you find new relatives, discover historical records that mention your ancestor, keep your family tree free of errors, and more.
To get started, visit myheritage.com and sign up.
How to start a family tree online with MyHeritage
When you sign up for an account on MyHeritage, you will be asked to enter your name and birth date as well as the names of your parents. Once you create your account, you’ll be prompted to enter details on each of your grandparents. Together, these 7 individuals (you, your two parents, and your 4 grandparents) constitute what we call the “magic 7”: the core family tree unit from which you will build out the rest of your tree.
The “magic 7” in MyHeritage family trees
Why “magic”? Because once you enter the basic details of these 7 individuals, our algorithms will very likely already be able to find Smart Matches™ for you, which will allow you to add details to your tree and even additional profiles from other trees on MyHeritage that include these individuals. You may also start to receive Record Matches with historical records on MyHeritage that mention those individuals.
Where do you go next? That depends on your goals. You may want to add profiles for other first-degree relatives, such as spouses, siblings, and children, and build out to include uncles, aunts, and cousins. The more detail you add, and the more profiles you add to your tree, the more likely you are to receive Smart Matches™, Record Matches, and Instant Discoveries™. You can also add profile photos for each family member, or scan and upload family photos and tag your family members in them. You can even use the MyHeritage photo features to repair, animate, enhance, or colorize old family photos.
What are the different family tree formats?
The traditional family tree format — the one with the horizontal and vertical lines connecting the different generations that we started sketching above — is the default format on MyHeritage, called “Family view”:
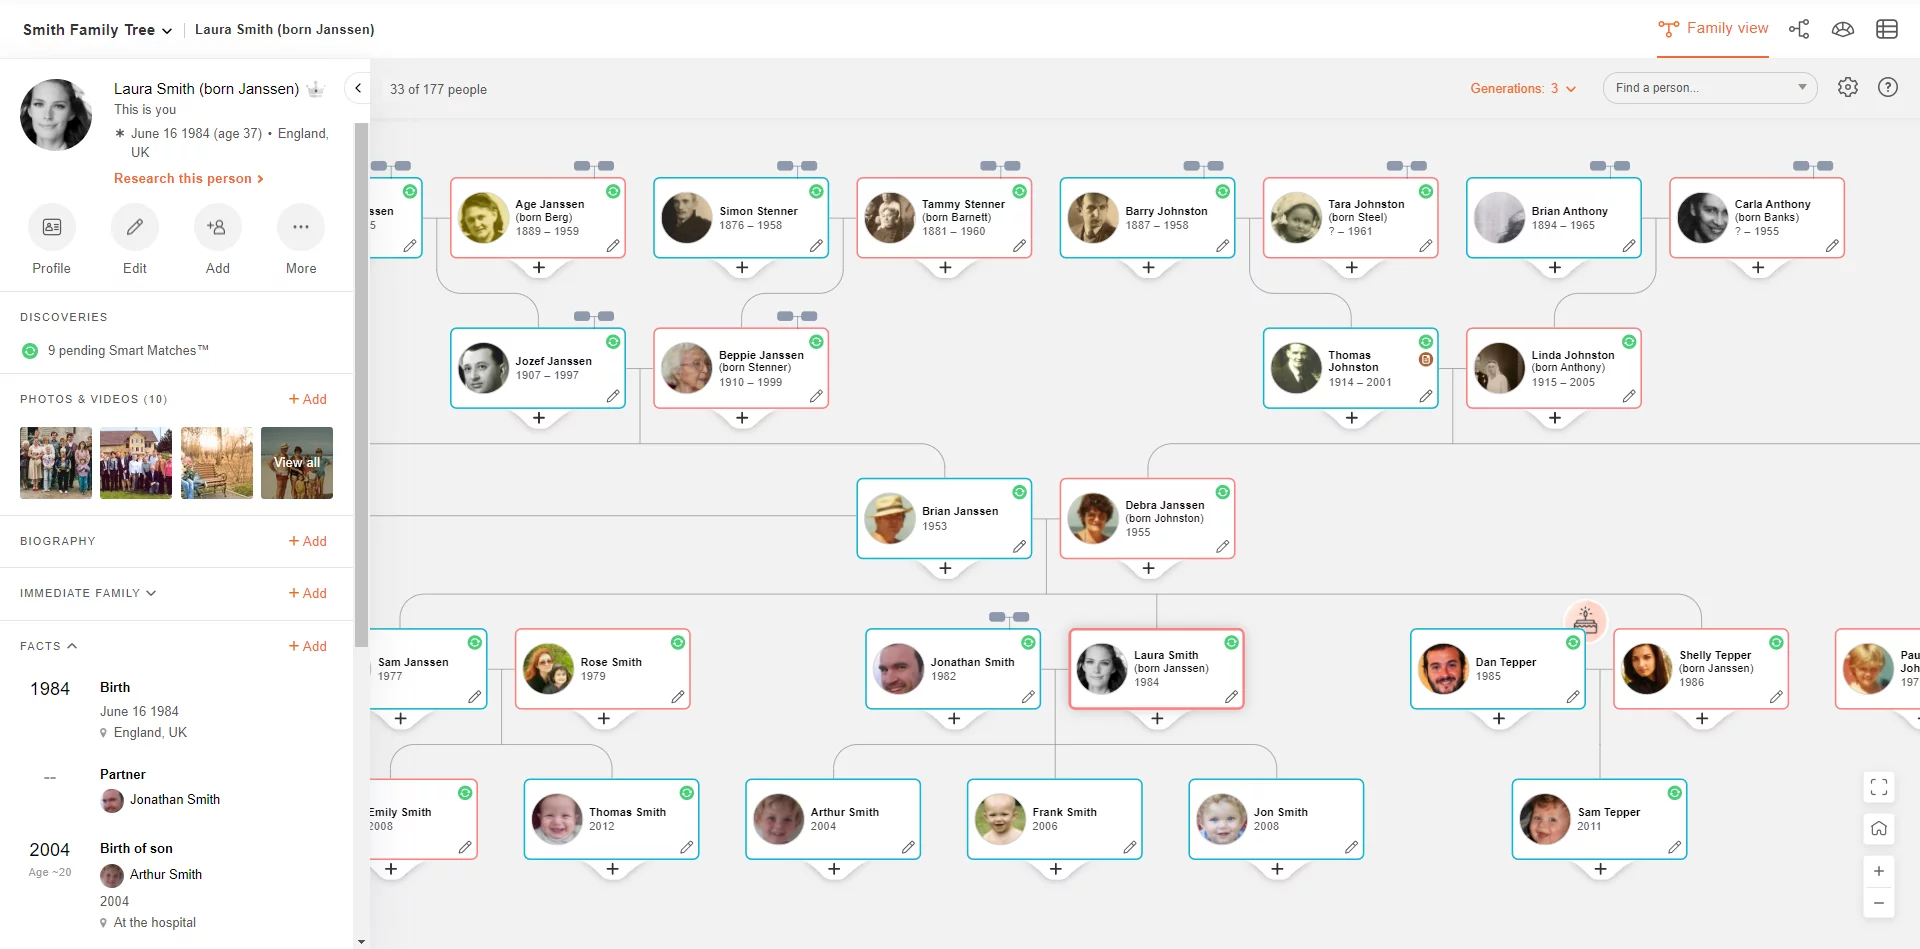
There are additional format options, however, that have their own unique advantages. MyHeritage offers three additional views you can use when building and working with your tree.
Pedigree view
In this format, the root individual appears on the left side of the screen, and each generation of direct ancestors appears in a new column on the right:
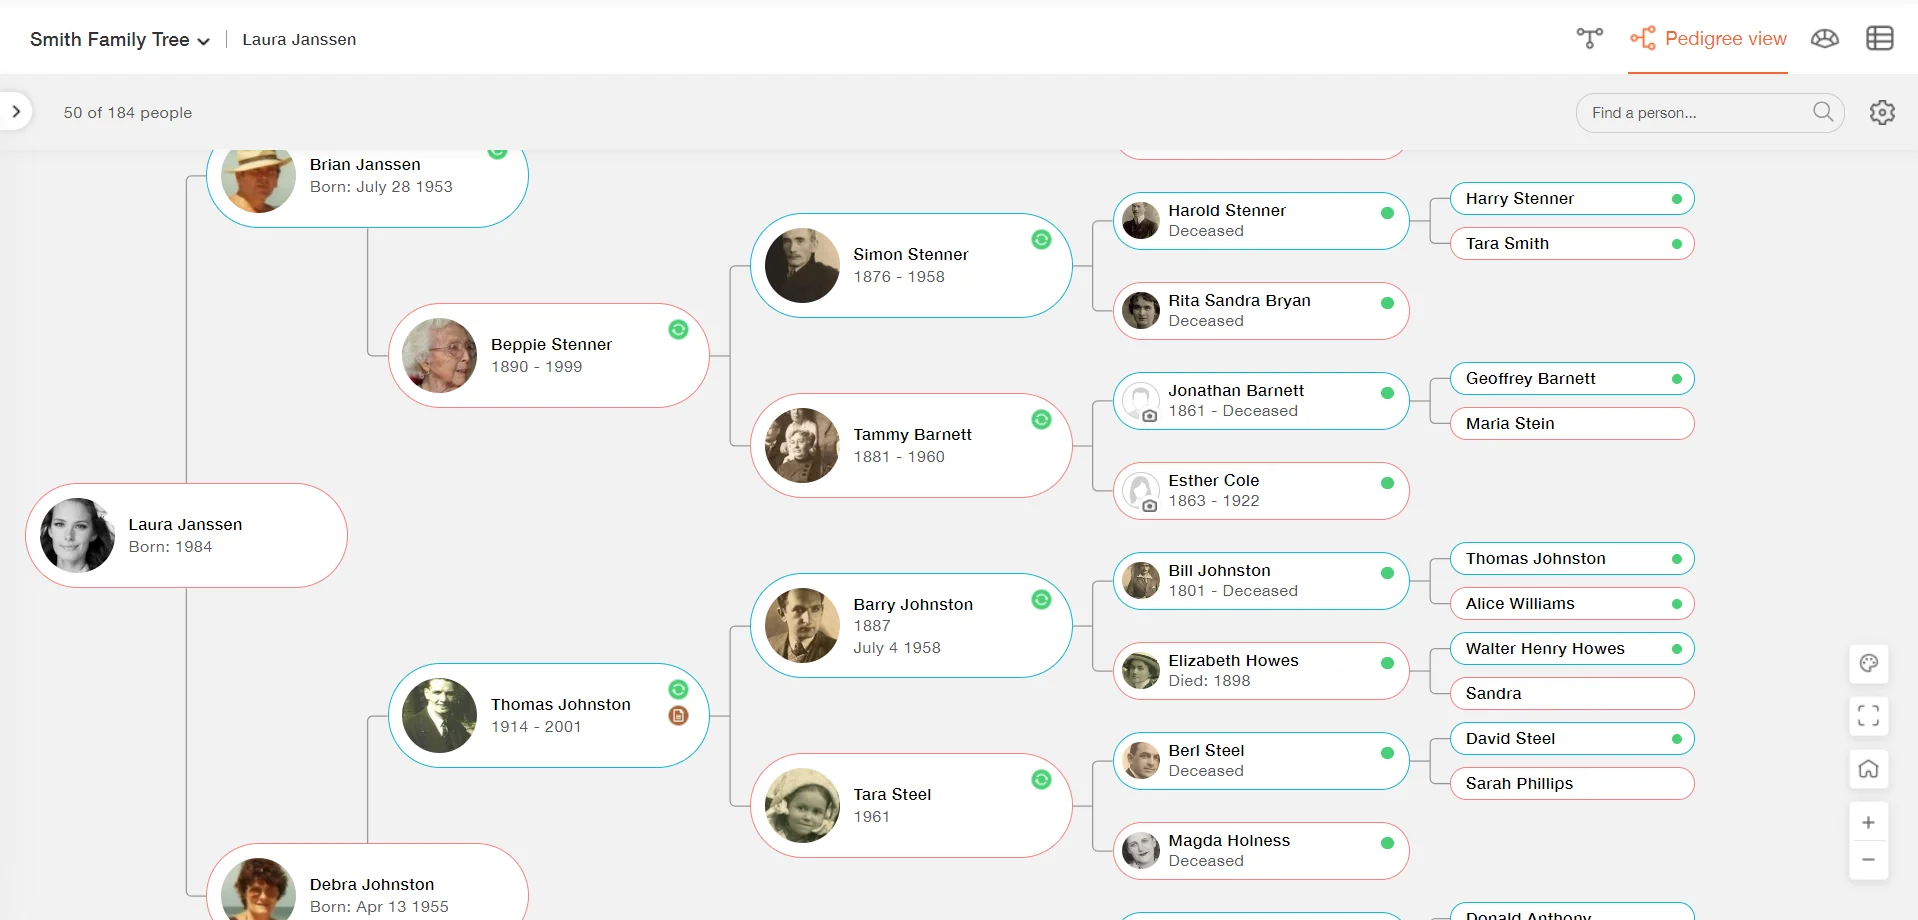
This view is particularly useful when focusing on an individual’s direct ancestors, because it cuts out all the “noise” of the other relatives, and is more compact, displaying more generations over a smaller area.
Fan view
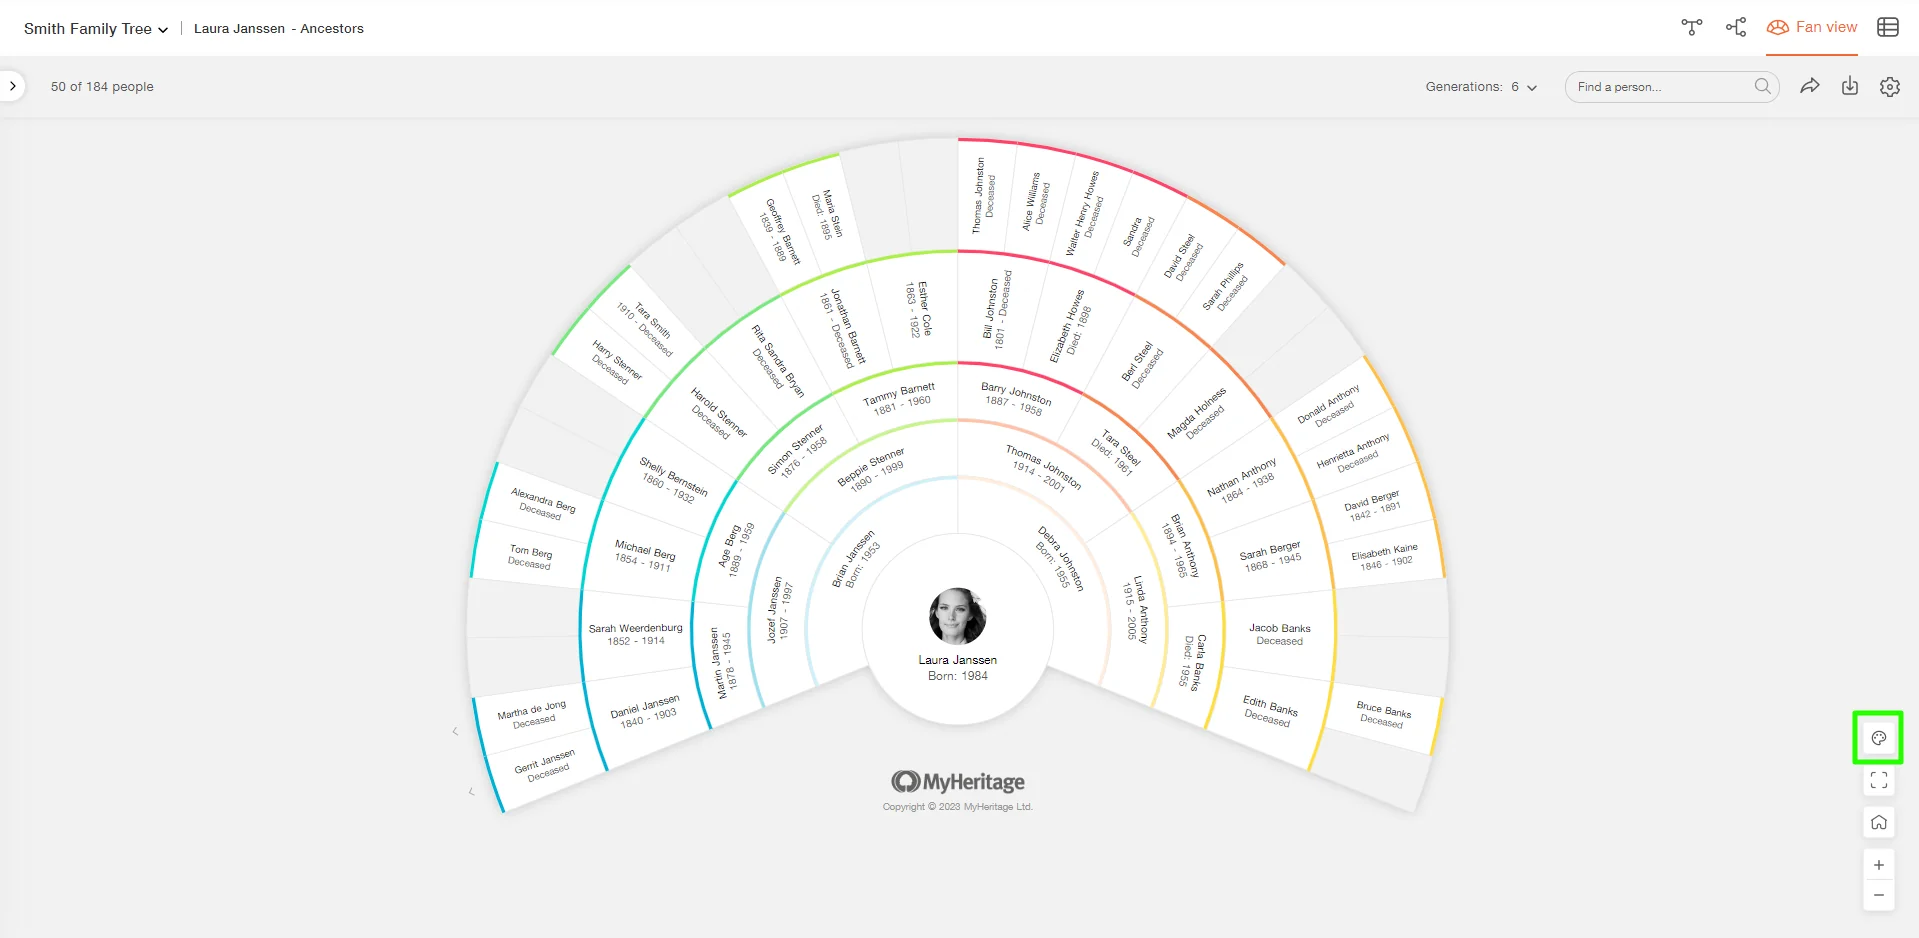
Fan view is similar to Pedigree view in that it only includes direct ancestors and can display more generations over a smaller space, but this time it features the root individual at the bottom center of the screen, with generations of ancestors arranged in arches radiating out.
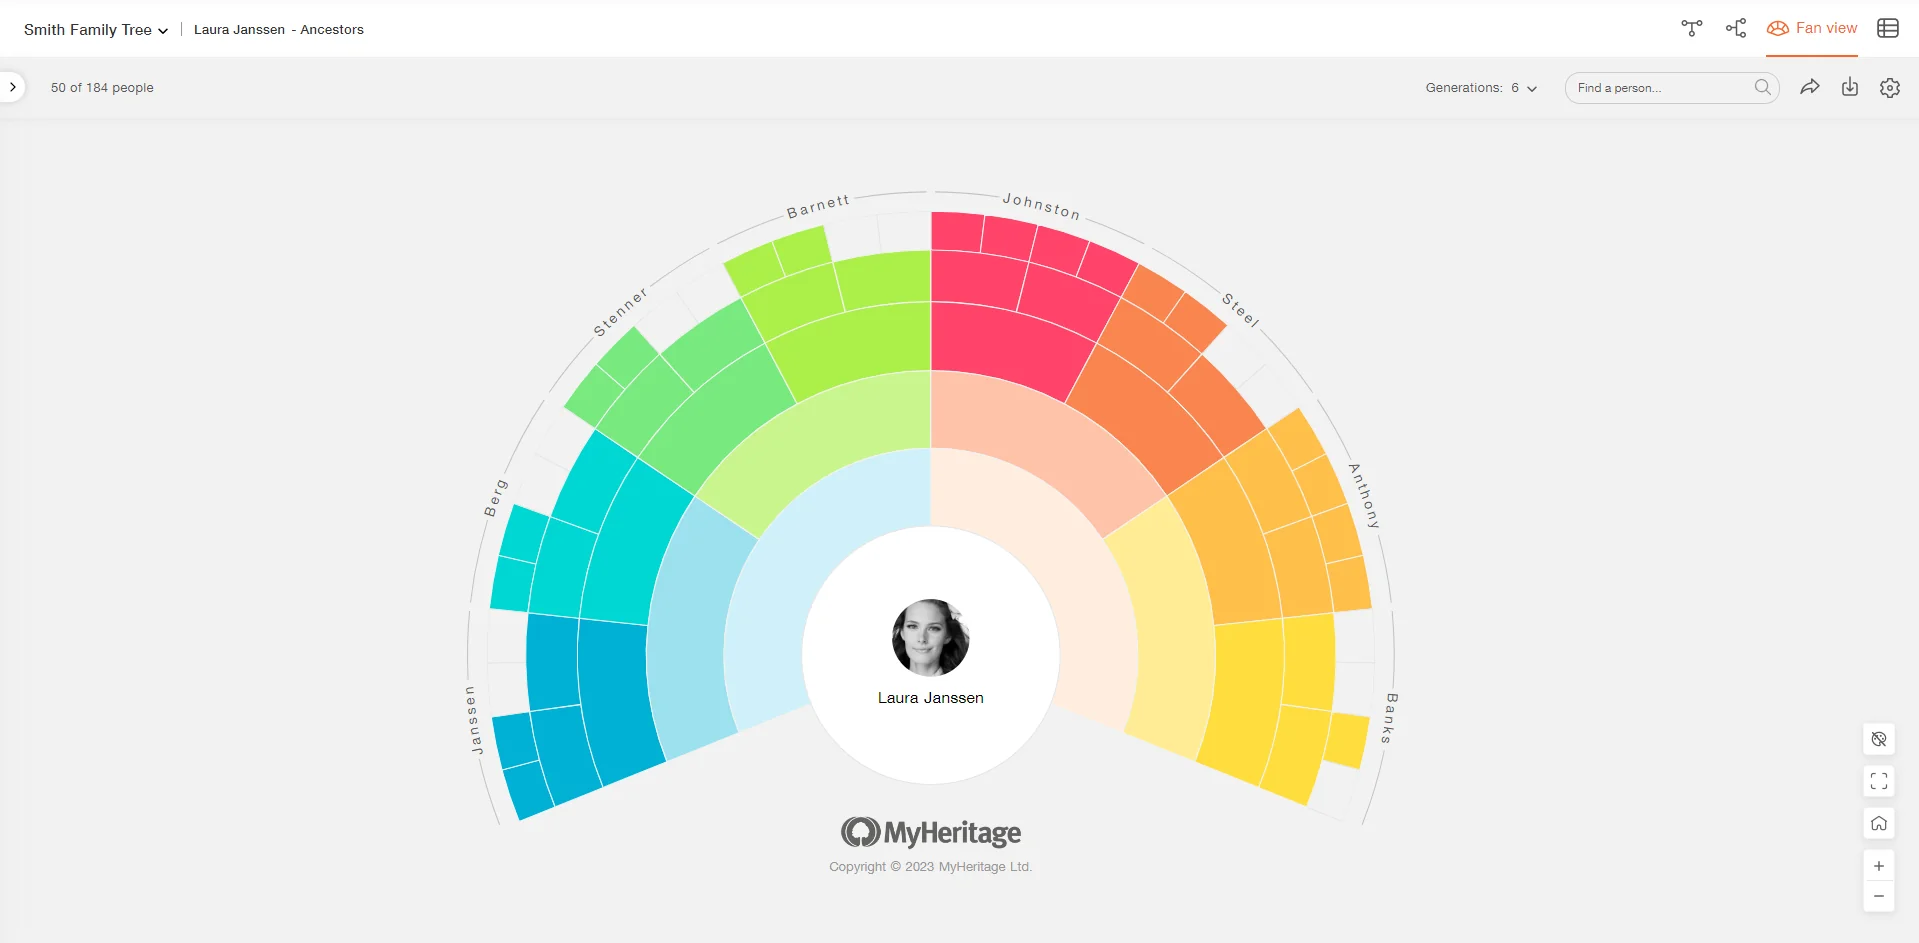
Using this view, you can also switch to “color mode,” which displays just the root individual with each branch of the family marked in a different color and the associated ancestral surnames on top:
List view
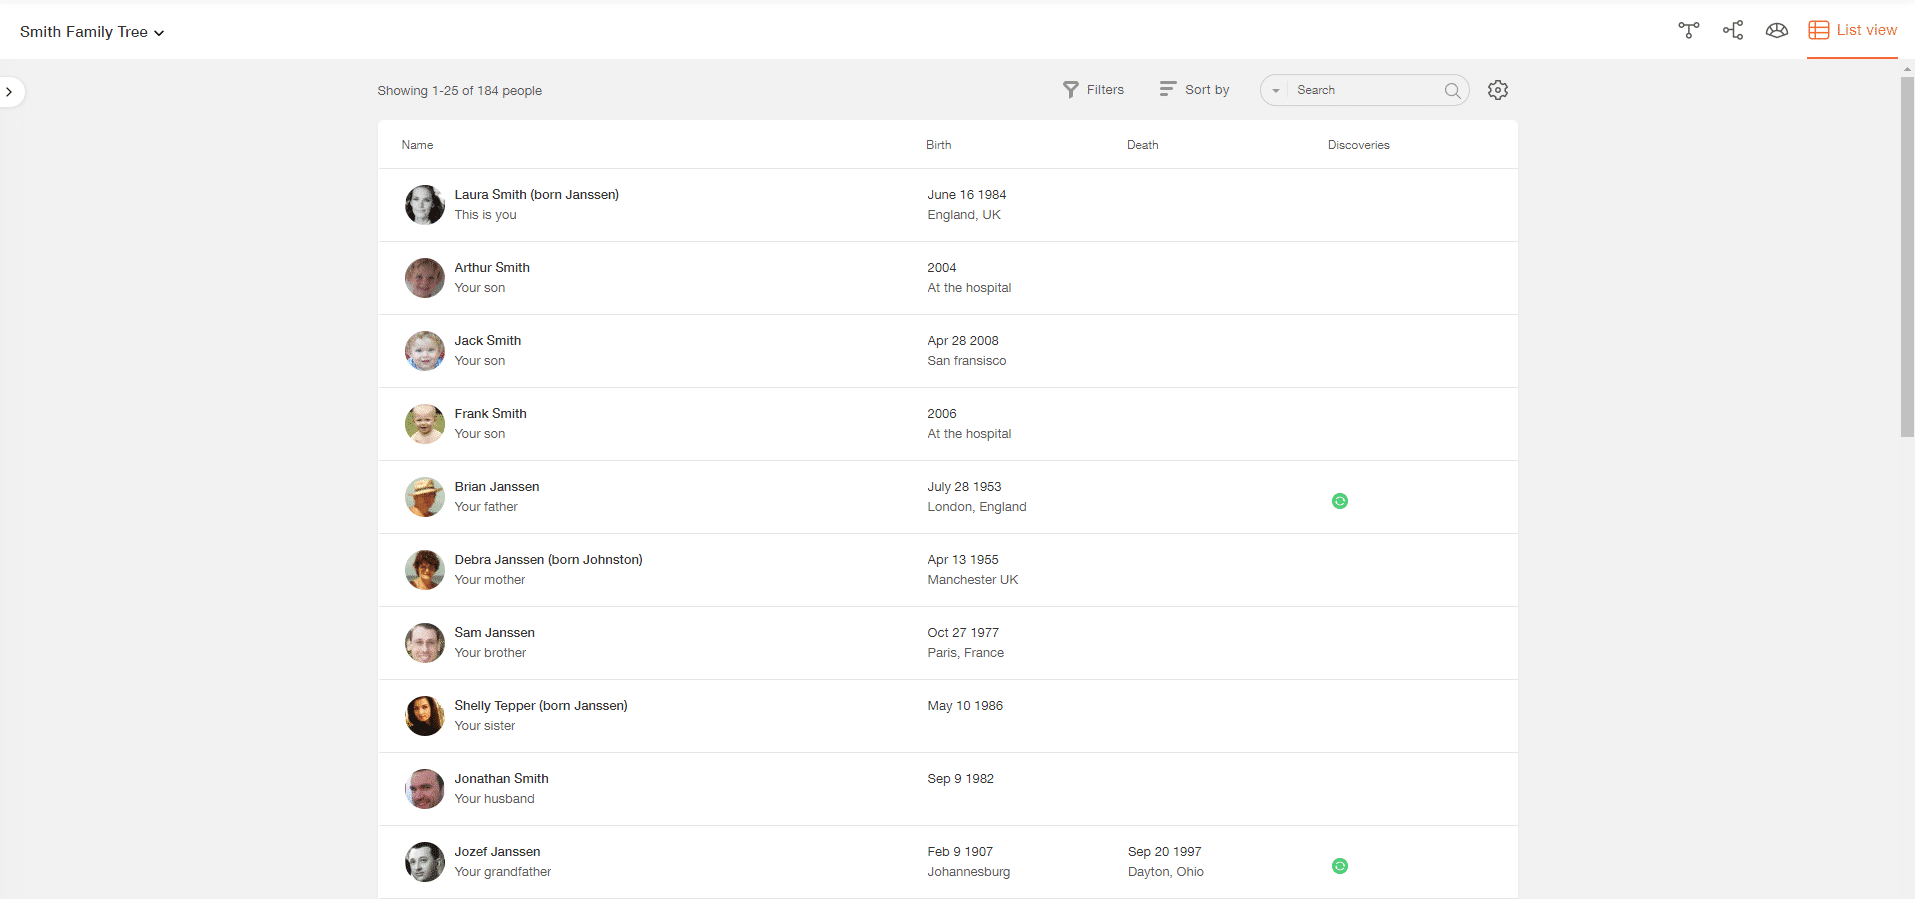
This view simply provides a comprehensive list of all the individuals in your family tree. While this may be less visually appealing than the other formats, it’s a good way to get a bird’s eye view of your tree and use the filter and sort options to focus on certain profiles.
Learn more about using the different tree views in this article: Making the Most of the Different Tree Views on MyHeritage, or the how-to video below:
Family Tree Timeline
The Family Tree Timeline is a unique way to view your family tree on MyHeritage: it allows you to explore how your family history unfolded over time. The Timeline is a visual representation of one individual from your family tree and his or her direct ancestors. The lifespans of these individuals are mapped on the same axis to allow you to see them in relation to each other, which can provide refreshing insights into your family history.
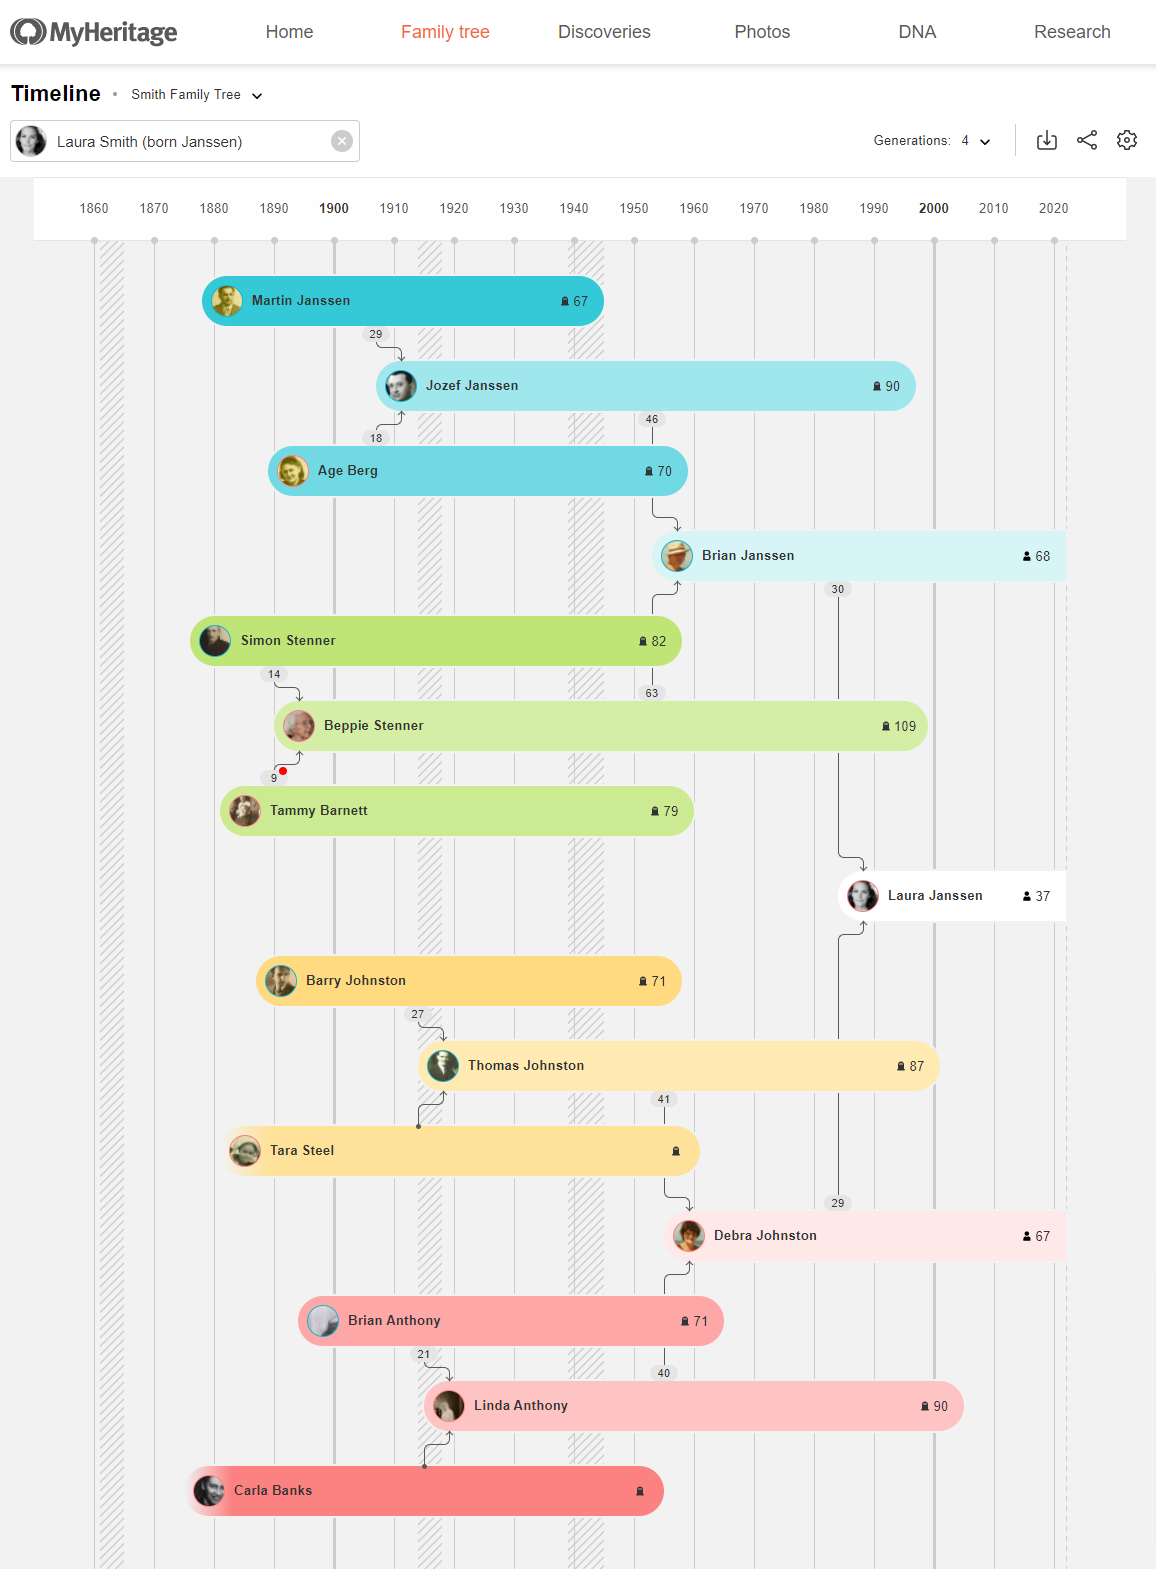
The Timeline shows the ages of your ancestors at various points in their lives: how old they were when they had children, how long they lived, and how their lifespans overlapped with those of other family members, or major world events.
Learn more about the Family Tree Timeline here: Exploring Your Family Tree Timeline
PedigreeMap™
PedigreeMap™ is another unique MyHeritage feature that allows you to explore your family history from another angle: this time, from a geographic perspective. PedigreeMap™ plots important events from your family tree on a map of the world, allowing you to visualize the places that play a role in your family history.
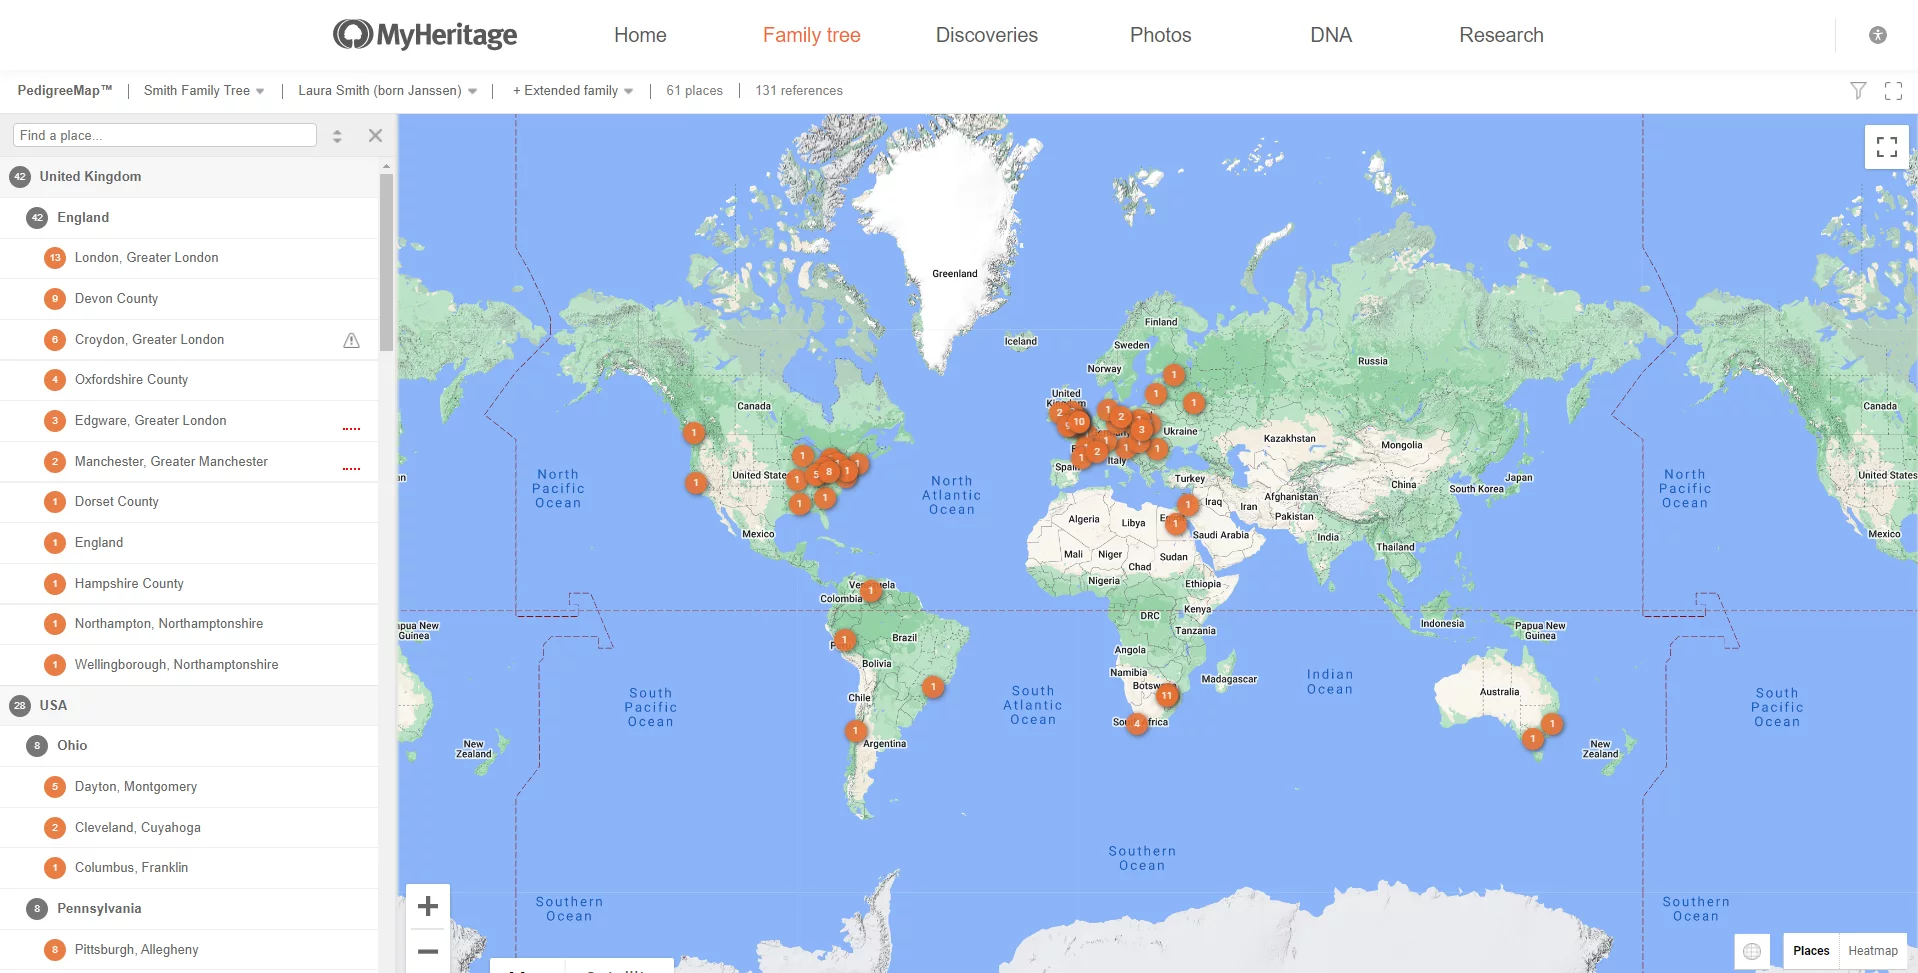
Learn more about using PedigreeMap™ here: How to Use PedigreeMap™
How to make a family tree chart
In addition to the basic tree building functions and the different tree views, MyHeritage offers a feature that allows you to create a customizable, beautifully designed tree chart that you can share as a PDF or print and frame.
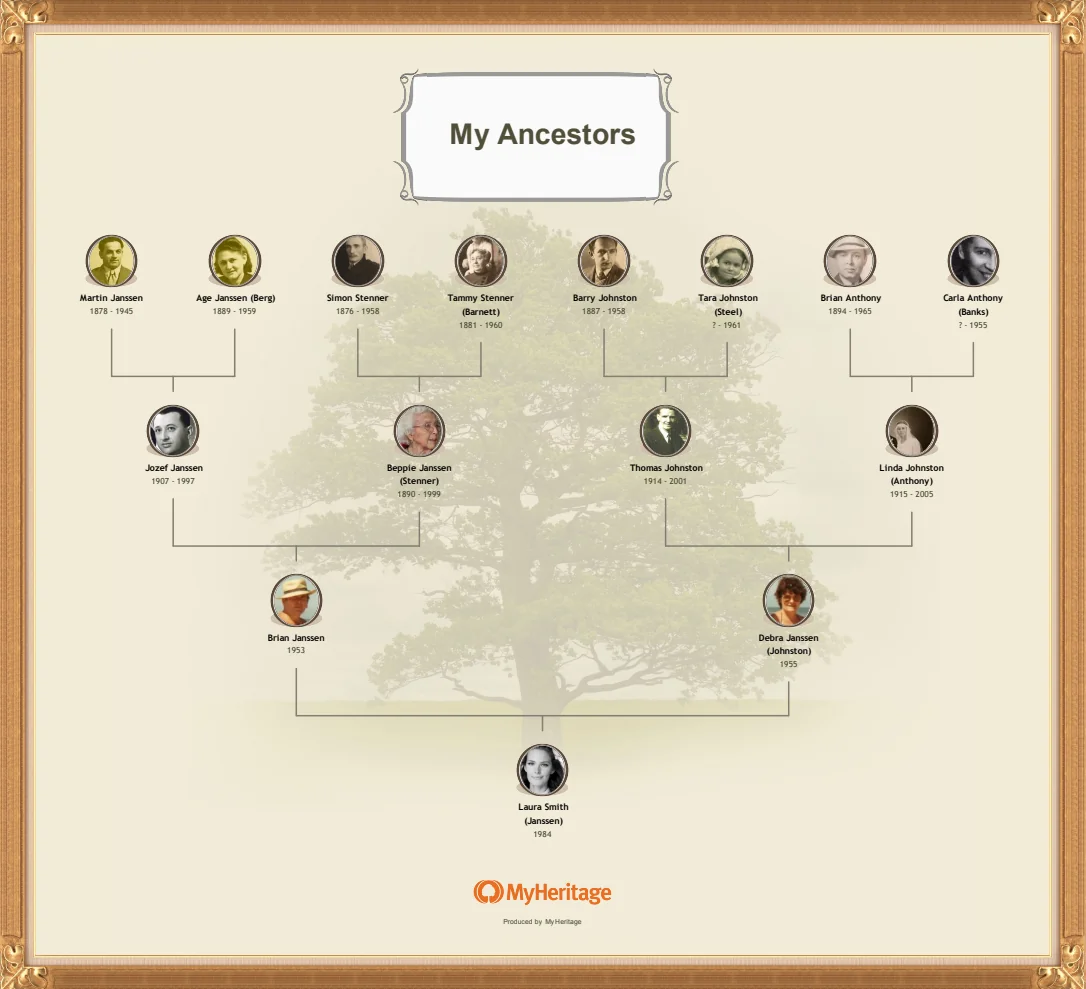
Using the chart feature, you can select from 8 different chart formats and either choose from dozens of preset styles or customize the design with the colors, fonts, background images, and design elements you prefer. You can also choose how many generations and how much information about each individual to include in the chart.
Once your chart has been generated, you can download it as a PDF to print at home or send to a local printing service. If your chart is larger than a standard printer page, you can choose to download it as a multiple-page image, which you can then print and piece together.
To get started building your chart, visit your MyHeritage family site, hover your mouse over the “Family tree” tab in the navigation bar, then select “Print charts & books.”
Learn more about creating a family tree chart on MyHeritage here: How to Make a Family Tree Chart or Book on MyHeritage
How to build a family tree website
Building a family tree on MyHeritage automatically creates a family tree website that you can use as an online meeting place for your family to work on your tree. No expertise or technological know-how is necessary! You can invite family members and set permissions so they can add comments and photos and/or edit details in your tree. You can also use your family site to keep track of upcoming events in your family such as birthdays and anniversaries, and even plan family events and send greetings to family members who are celebrating a birthday or anniversary.
Get started with your family tree today
Creating a family tree is one of the most rewarding ways to explore your heritage. It helps you connect the dots between generations, uncover fascinating stories, and preserve your family’s legacy for the future. And the best part? You don’t need to be a genealogy expert to begin.
With just a few names and dates, you can start building your tree in minutes. MyHeritage offers intuitive tools, Smart Matches™, and historical records that make it easier than ever to find and add relatives. So why wait? Dive into your family history today — you never know what incredible discoveries await!
Start building your tree on MyHeritage today!
FAQs about creating your family tree
What is the easiest way to create a family tree?
The easiest way is to use an online family tree builder like MyHeritage. It’s free to start, beginner-friendly, and includes smart tools that automatically find relatives and records for you. Just enter a few names, and the platform helps fill in the rest.
How do you make a family tree for beginners?
Start with yourself, add your close relatives, and gradually expand. A platform like MyHeritage can make the process intuitive with helpful hints along the way.
How can I create a family tree in Word?
You can make a family tree in Word using SmartArt. Choose a hierarchy layout, add names, and adjust the boxes to fit your family structure. It’s great for a basic layout, but for a more detailed and dynamic tree, online tools may be a better choice.
How do you make a simple family tree diagram?
A simple diagram includes names connected by lines to show relationships. You can draw it by hand, use templates in Word or PowerPoint, or build it online. Free family tree tools offer ready-made templates that let you create and customize your tree quickly and easily.
What is the best software to create a family tree?
The best software combines ease of use with powerful features — like MyHeritage, which offers automatic matching, historical records, and photo tools. It’s great for both beginners and experienced researchers.
Is there a free way to create a family tree?
Yes! You can start a free trial and create a free family tree on MyHeritage, which lets you add up to 250 people and access basic features. It’s a great way to get started and grow your tree over time. Optional paid plans unlock even more advanced tools and records.

