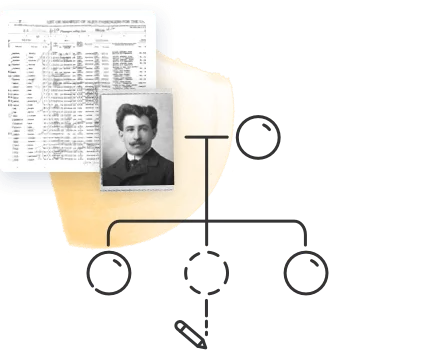

MyStories makes it easy and meaningful to write a book about your life — or help someone else do the same. In this guide, we’ll walk you through every step of the process, from signing up and answering questions to editing stories, adding photos, and printing a beautiful keepsake you’ll treasure for years to come.
Contents:
- Getting started
- Answering questions by email
- Your account dashboard
- Adding, reordering, and editing questions
- Editing and formatting stories
- Audio recording and transcription
- Adding and positioning photos
- Previewing, downloading, and printing your book
Getting started
Visit mystories.com and click “Get started.”
Select who the storyteller will be: you, or someone else you want to give the book to as a gift.

Then, enter your details and those of the recipient, if relevant. A membership includes one copy of the resulting book, but you can also choose to purchase additional copies to be shipped to you or the recipient once the book is ready.
If you’re giving MyStories as a gift, you can schedule it to be sent on a specific date — for example, a birthday or anniversary. You can also personalize it with a custom greeting.

When you complete the payment process, you’ll receive a welcome email and your receipt. If you purchased MyStories as a gift, the recipient will receive the welcome email on the day you selected. The first question will be sent the following day.
If you don’t receive an email from MyStories after your purchase, check your spam folder and ensure that stories@mystories.com is on your list of safe contacts.
Answering questions by email
The process of writing the book couldn’t be easier. Each week, you’ll receive an email with a thoughtful prompt question. All you have to do is reply to the email with your answer and attach any photos you’d like to include.

Click “Send” to submit the story. You’ll receive an email shortly after to confirm that your story was received.
If you send a reply and want to add more to the story, you can simply reply to the same email again. Whatever you
If you prefer to answer the question on the MyStories website, you can always click the “Tell your story” button, which will take you straight to the story editor. There, you can edit and format your stories and even use audio transcription to dictate your stories, as detailed below.
Your account dashboard
To access your account, visit MyStories.com and log in. No password is necessary: simply enter your email address, and you’ll receive a secure one-time login link via email. Click the link to log in to your account.

At the top of the dashboard, you’ll find a preview cover of your book along with the title and byline. Click the pencil icons next to the title or byline to edit them.
All 52 questions that were automatically selected to be sent to you appear under “My stories.” You can filter the questions to view only the ones that haven’t been answered yet by clicking “Not started,” or to see only the ones that have already been answered by clicking “Completed.”
Adding, reordering, and editing questions
If you wish to add a question to the list, click “Add questions” on the right and choose from a large selection of questions. You can filter the questions by category, search for a question containing a specific keyword, or write your own question by clicking “Add your own question” (highlighted in red below). When you’re done adding questions, click “Done” (marked in green below).

Any new questions will be added to the bottom of the list.
You can reorder the questions by dragging and dropping them: click and hold the parallel lines icon next to the number, and drag the question up or down as you wish. When you reorder questions, the email send dates will change accordingly.
To delete a question, click the three-dot icon on the right and select “Delete.” Note that if this question has already been answered with a story, the story and any photos attached will also be deleted.
Editing and formatting stories
You don’t have to wait for a question to be sent via email to answer it — you can always click “Start writing” next to the question on your dashboard and write your answer there. If you add a story to a question that hasn’t been emailed to you yet, the emails will be rescheduled to skip that question.
If you’ve already answered a question, a checkmark will appear next to it, and the button on the right will read “Edit story.”
Clicking “Start writing” or “Edit story” will take you to the story editor.

Use the buttons on the top left to add bold, italic, or underline formatting to your text just as you would in a word processor: select the text you want to apply formatting to and click the corresponding button.
Click “Preview” at the top of the page to see how this story will appear within the book. You can also download this PDF file of an individual story to save and share.
When you’re finished editing, click “Save” at the top right of the editor.
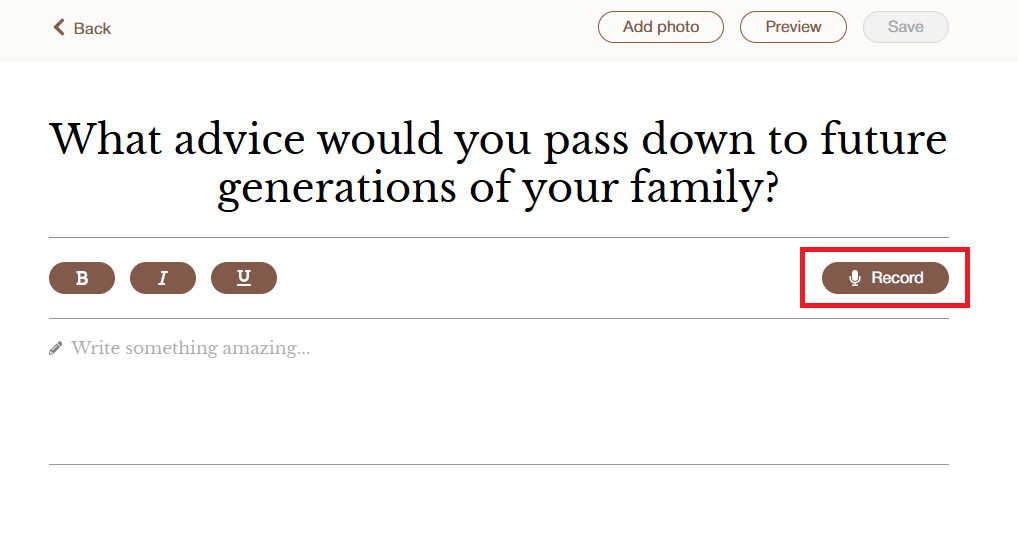
Audio recording and transcription
If you’d rather dictate your answer instead of typing it out, you can do so straight from the story editor. Click the “Record” button on the upper right side of the text window.
You can record the stories from a desktop computer, mobile phone, or tablet. Before recording your story, enable microphone access for your device by following the steps on the screen. Once enabled, click “Start recording” and start speaking.
Stories don’t need to be recorded in one go. You can click the “Pause” icon at any time to pause the recording in the middle, and click the microphone icon to resume recording, marked below in red.
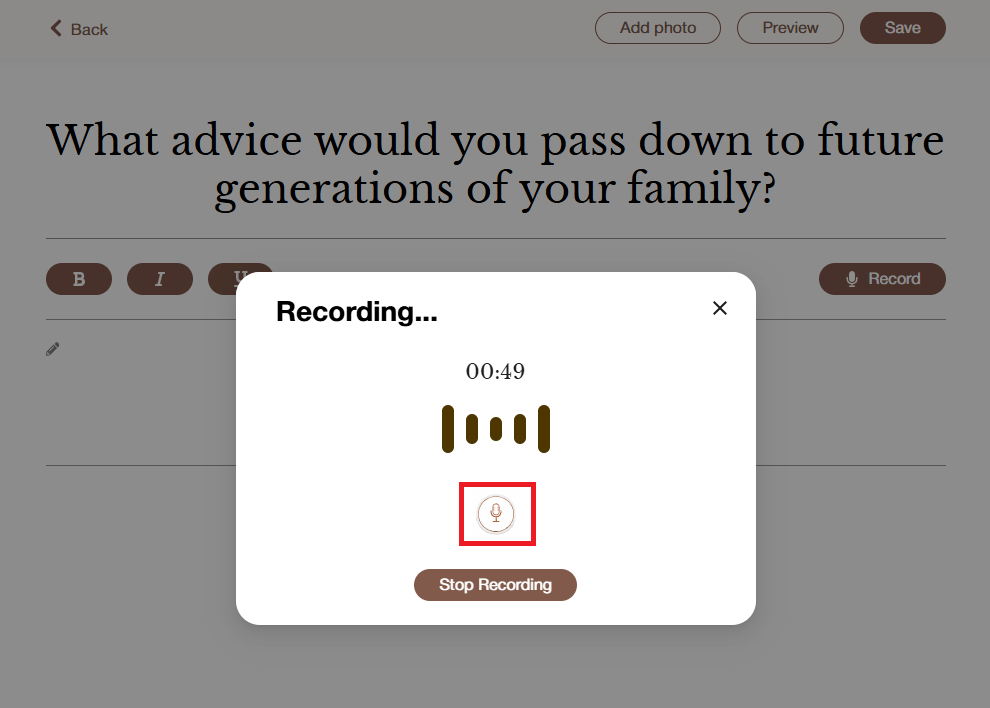
When you’re done, click “Stop Recording.” The recording will be automatically transcribed and added as text in the story editor.
If you’ve already written part of your story, the recording will be added below the text you wrote earlier. From there you can edit and format the text as you wish.
You can also add multiple recordings for the same story, and each new recording will be transcribed directly below the previous one.
All recordings appear at the bottom of the page, together with a short snippet of the transcription. To listen to a recording, click the “Play” icon (marked below in green). To edit the recording name, click the pencil icon. If you wish, you can click the download icon, marked below in red, and share it by email, text message, or another platform. You can delete the recording by clicking the trash icon on the top right. The transcribed text from the recording will not be deleted automatically if you delete the recording.

Adding and positioning photos
To upload a photo to a story in the story editor, click “Add photo” at the top right of the page and select the photo from your computer or device.

You can add a caption to the photo.
To move the photo to a different place within the story, click on the photo and then use the “drag handle” icon (marked below in red) to move it where you want.
To resize the photo, click on one of the corners of the photo and drag to adjust the size. When you’re done, click “Save”, marked below in green.

Previewing, downloading, and printing your book
Preview your book by clicking “Preview book” at the top of the page on your account dashboard:

This will open a PDF file of the interior of your book with all the questions you have already answered. You can download this PDF to save to your computer or share as you please. As mentioned above, you can also download PDFs of individual stories to save and share.
When you’re ready to print your book, click “Print your book.”
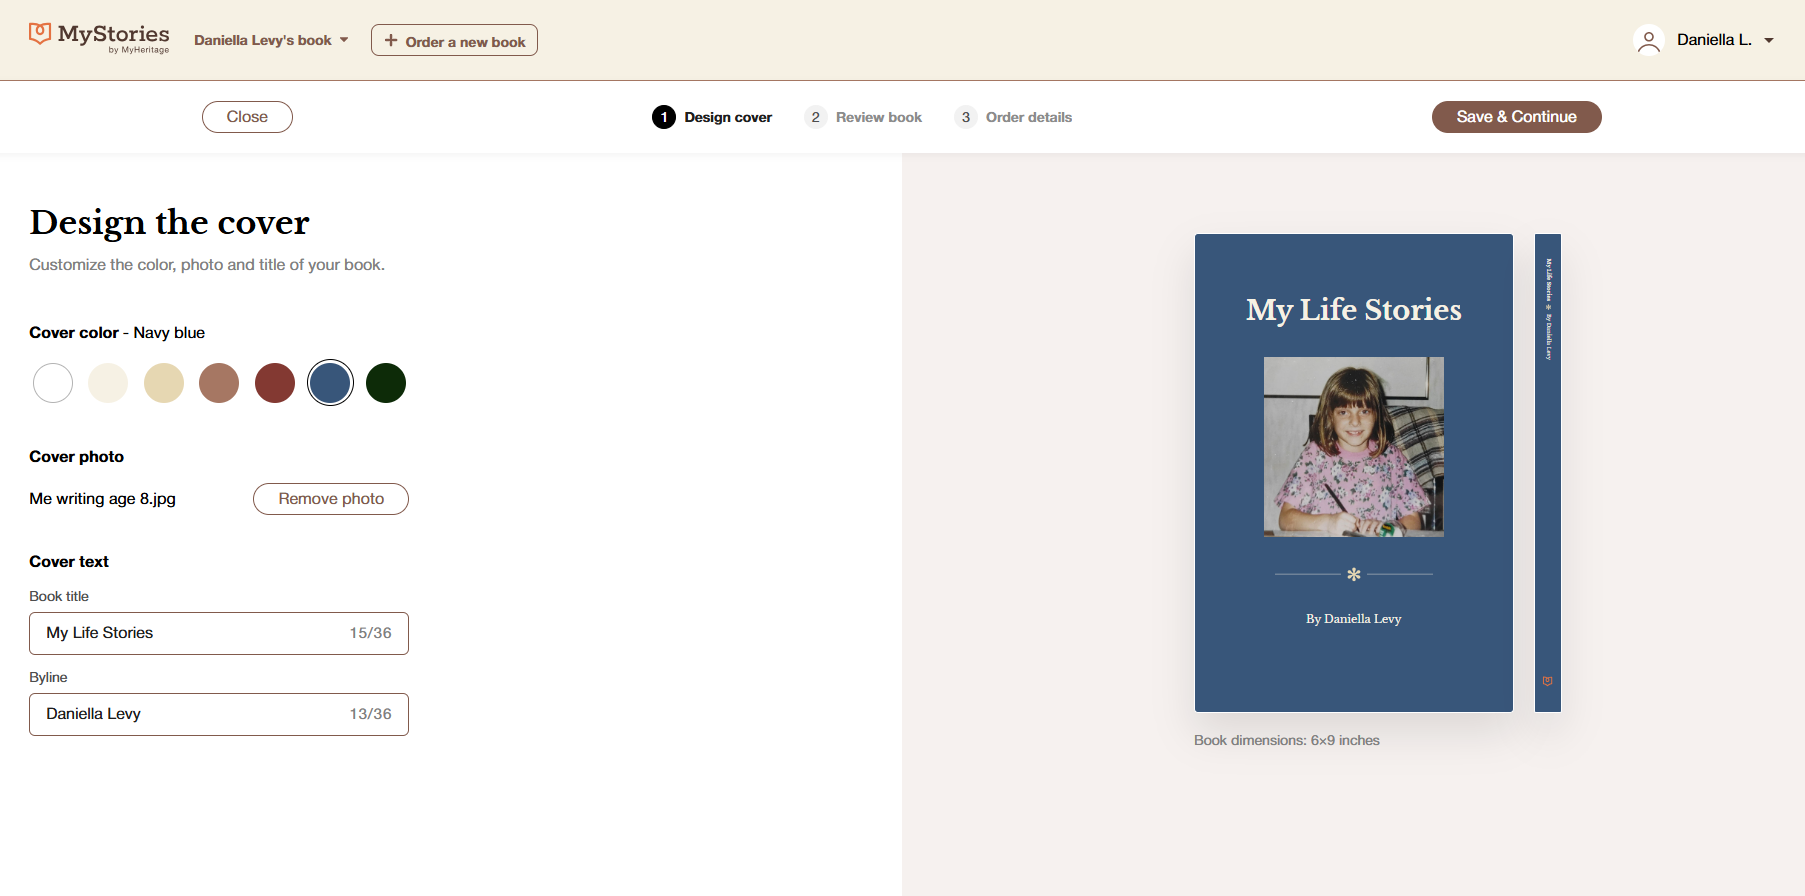
Select a color, photo, and text for the cover of your book. If the cover photo you selected is not square, you’ll be able to crop it to your liking. When you’re done, click “Save & Continue.”
Next, review the book and make sure you’re happy with the contents and don’t want to make any further changes to it. If you find a mistake or something you’d like to change, you can just click “Back” and edit the story as you wish.
If the book is final and ready, tick the box next to “I confirm that the book is final and ready to print,” and click “Save & Continue.”

If you wish to purchase additional copies of your book, you can add them at this stage.
Add your shipping details, and then click “Print book.”
Standard shipping typically takes around 10 business days. You can also choose economy shipping, which will take longer, or expedited shipping, which is faster.
Got more questions about MyStories? Check out the FAQ here.
For useful tips on making the most of your MyStories membership, check out the following article: How to Write a Memoir in 20 Minutes a Week: 7 Tips for Making the Most of MyStories.