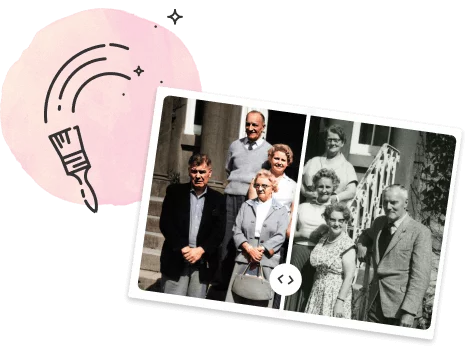
MyHeritage In Color™ breathes life into old family photos by restoring their colors or colorizing them if they’re black and white. In this article, you’ll learn how to use the color restoration feature of MyHeritage In Color™.
Overview: What is MyHeritage In Color™ color restoration?
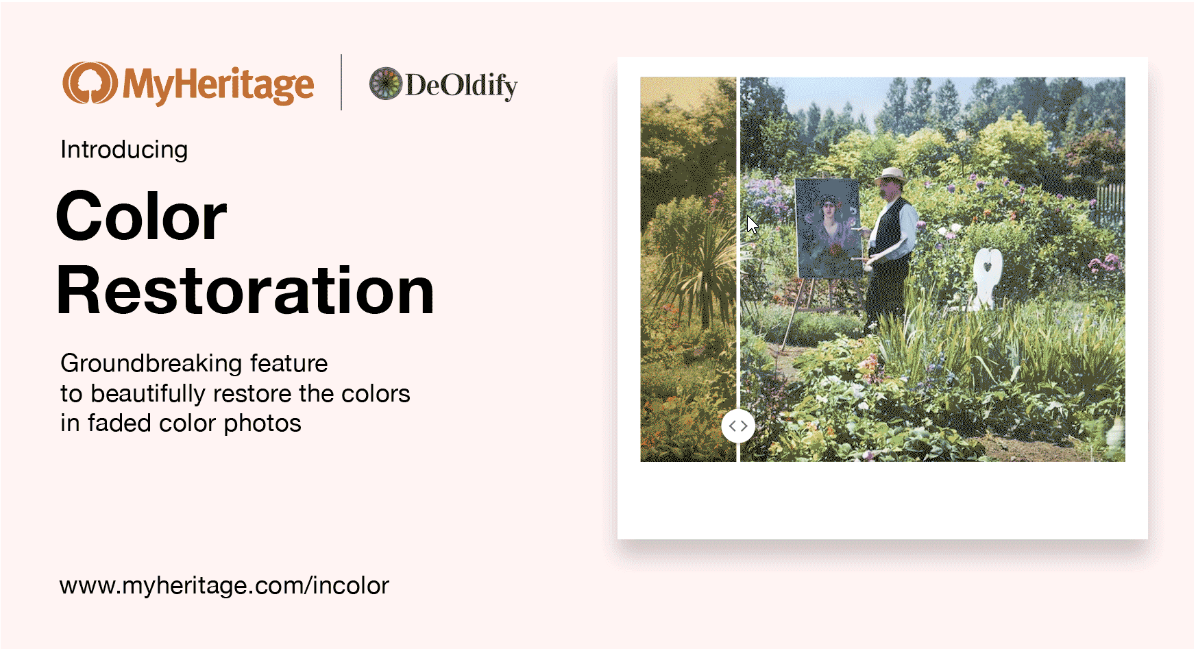
Color restoration beautifully restores the colors in faded color photos. Unlike colorization, which simulates colors of black and white photos, the new color restoration feature is ideal for restoring scanned photos from the 1950s to the 1990s that were originally taken in color, but have faded over the years. This gives you the chance to revive your favorite moments from the days before digital photography. With color restoration, you get the authentic colors revived in seconds, and no colors are guessed in the process. As a bonus, color restoration also sharpens photos and improves their level of detail. When color restoration is applied, the original photo is left intact and a separate copy is created with the restored colors.

Over time, old color photos tend to fade. Bright and vibrant hues from decades past turn different shades. UV light can affect the chemical makeup of printed photos, causing them to turn sickly yellow and lose their colors. With color restoration on MyHeritage, even the most worn out color photos can come back to life, with exceptional results.
The color restoration technology was licensed exclusively by MyHeritage from DeOldify deep learning experts Jason Antic and Dana Kelley, who also developed the world’s #1 colorization algorithms, which were licensed and integrated into MyHeritage. Colorization and color restoration technologies work differently, but both make clever use of artificial intelligence.
When you upload your photo, MyHeritage first applies technology to quickly determine automatically if the photo is black and white (or sepia) or was originally taken in color. If the photo was originally taken in black and white, then you will have the option to colorize it, and if it was originally taken in color, you can choose to restore its colors. Obviously, if the photo is in color and its colors look perfect, you need not apply any action to it.
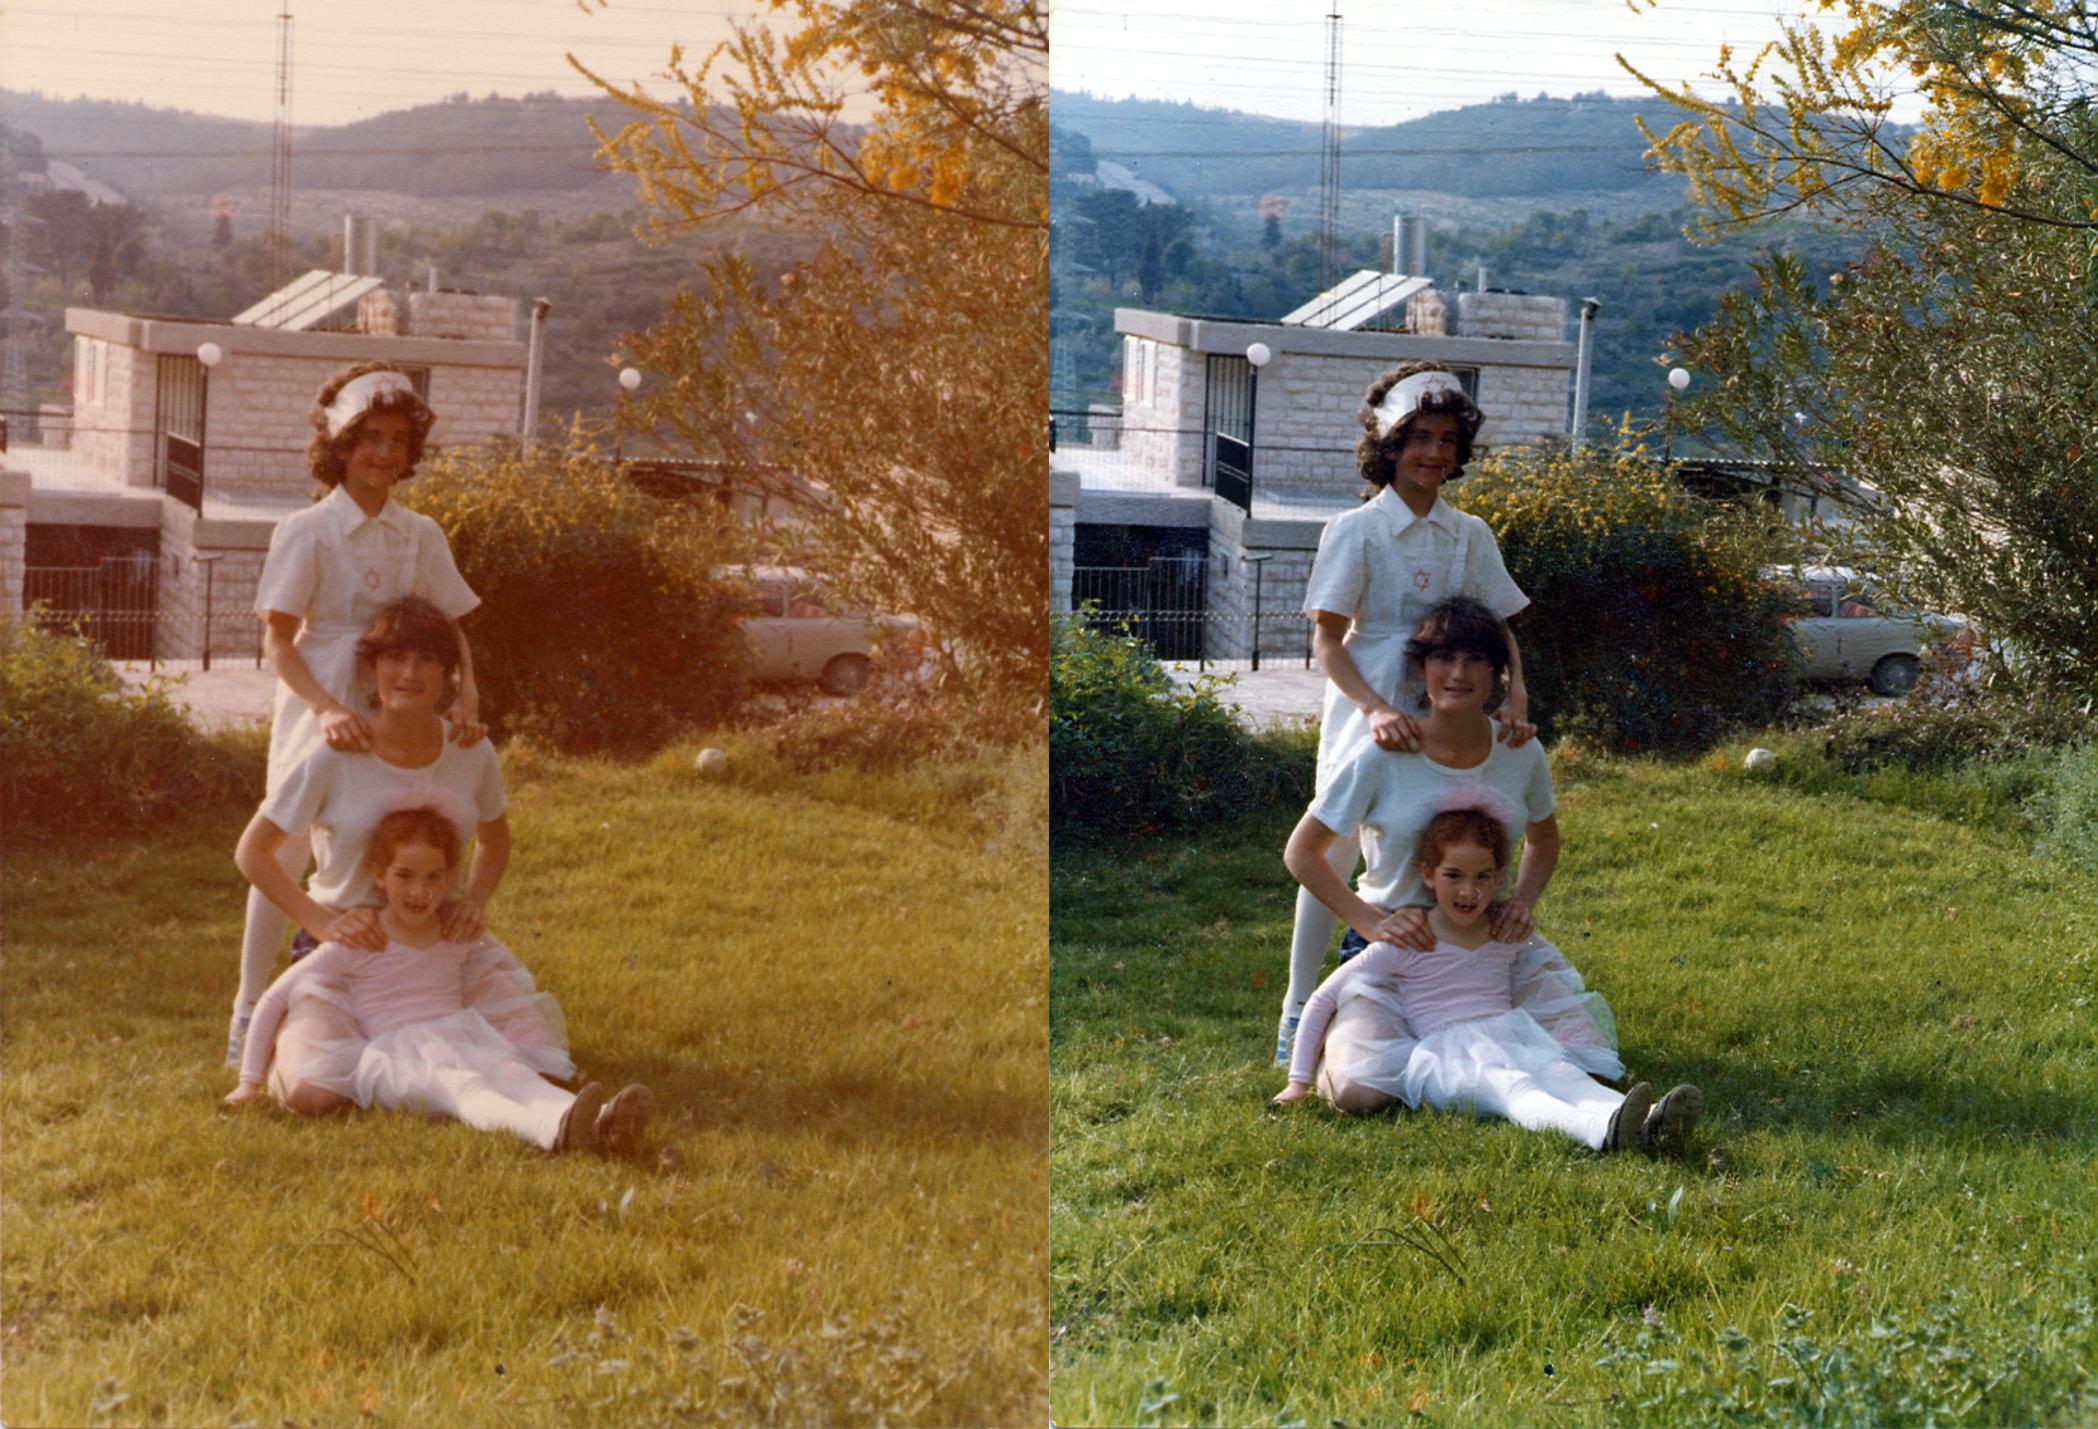
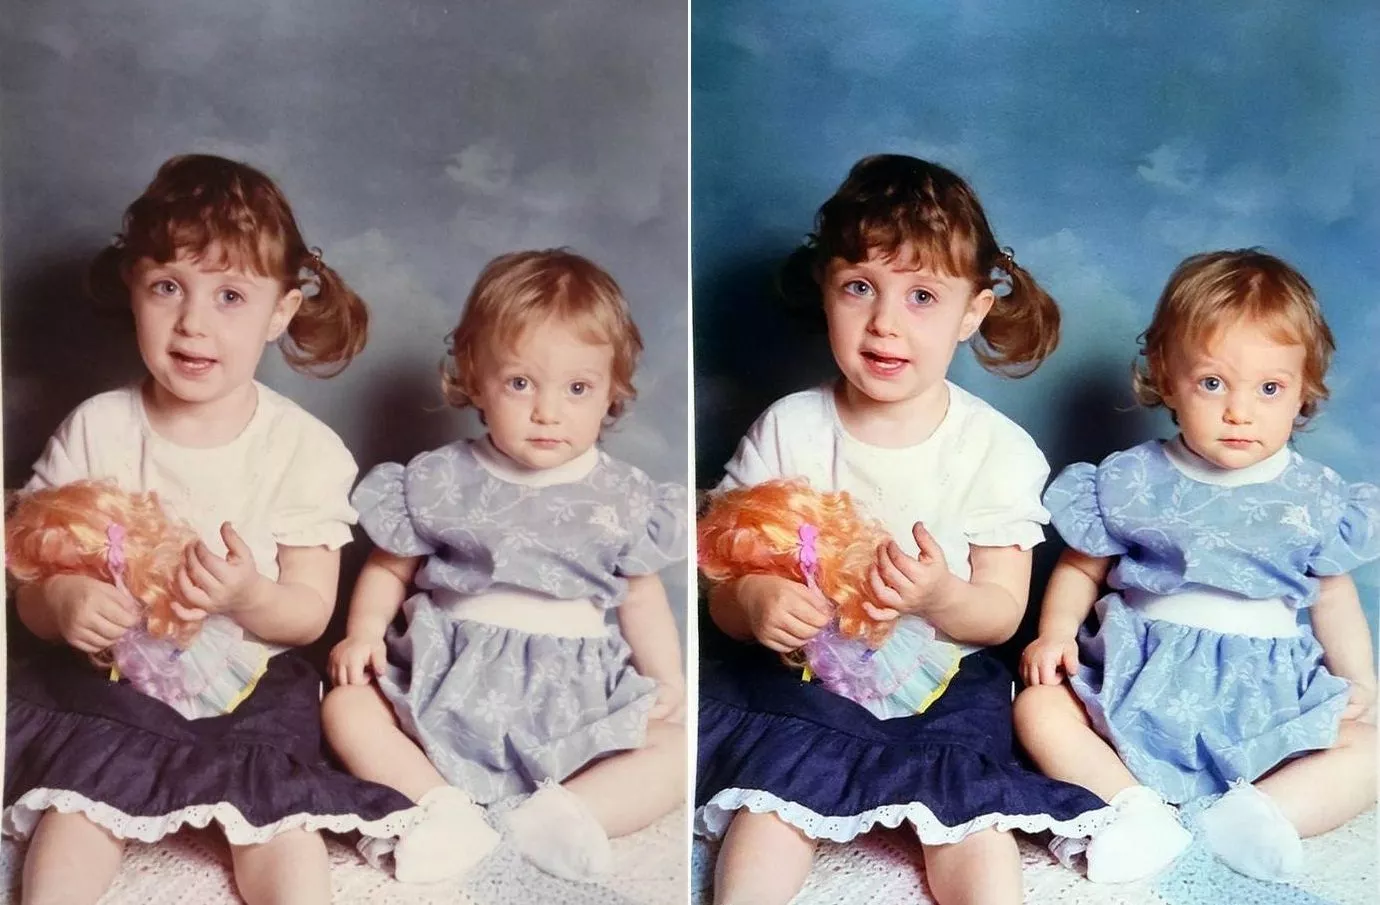
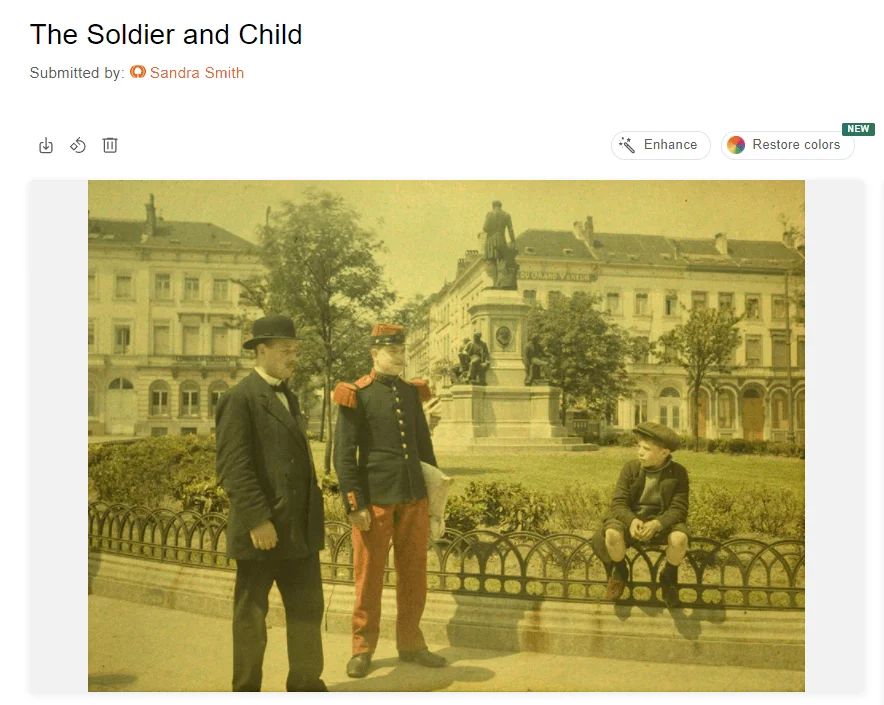
Examples
Here are some incredible examples of color photos whose colors were restored using the feature.
How to use color restoration
To begin, visit myheritage.com/incolor.
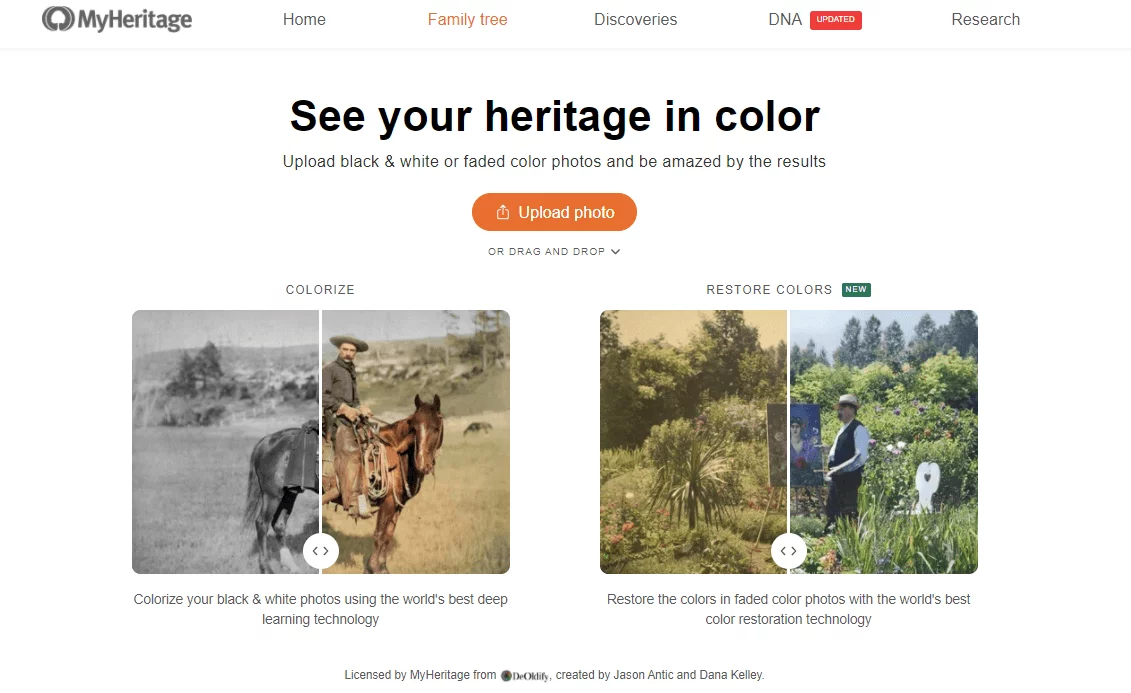
Click “Upload photo” to choose a file from your computer. Or, drag and drop a photo of your choice onto the page.
You’ll be asked to sign up to MyHeritage to restore the colors in your photos. Signing up is free. If you already have a MyHeritage account, and you aren’t logged in, simply select the “Log in” option on the bottom of the popup.
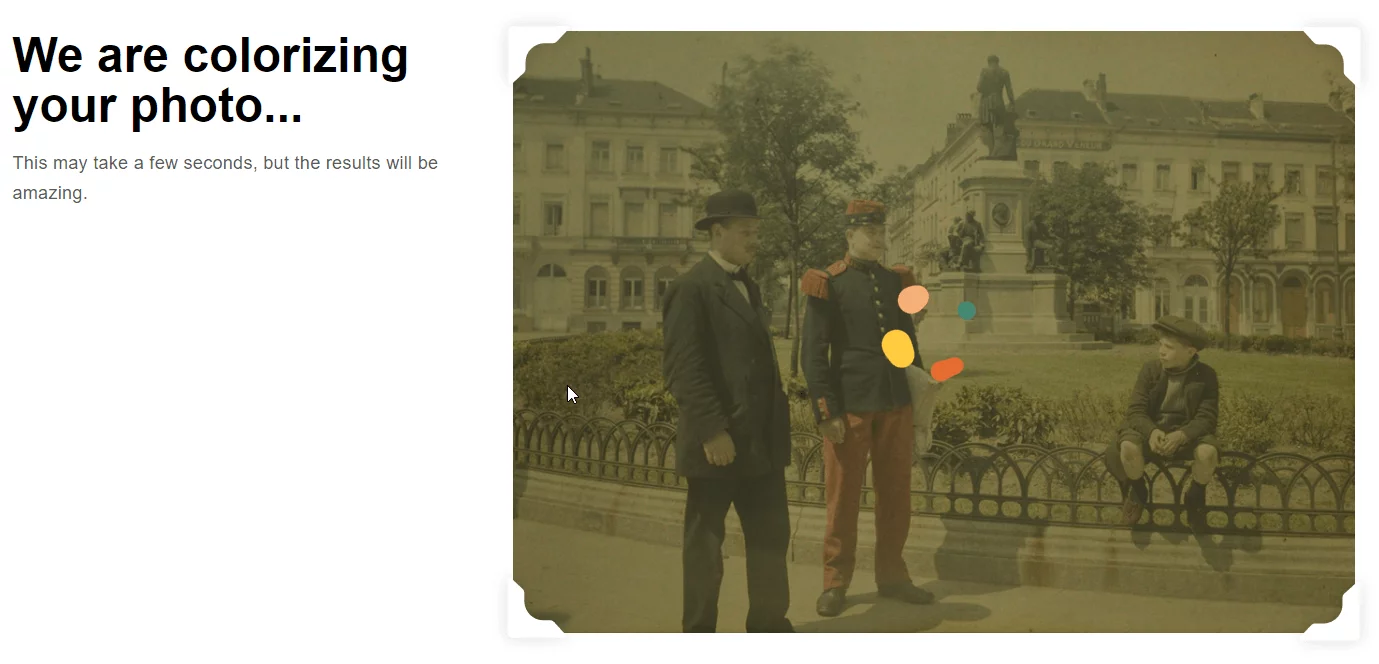
Once you upload your photo, MyHeritage will handle things automatically. It will detect if the photo was originally taken in black and white or in color. If the photo is black and white, it will be colorized; if it’s color, then its colors will be restored. This process typically takes between 3 to 10 seconds, depending on the size and level of detail in the photo.
Once the color-restored photo is ready, it will be displayed.
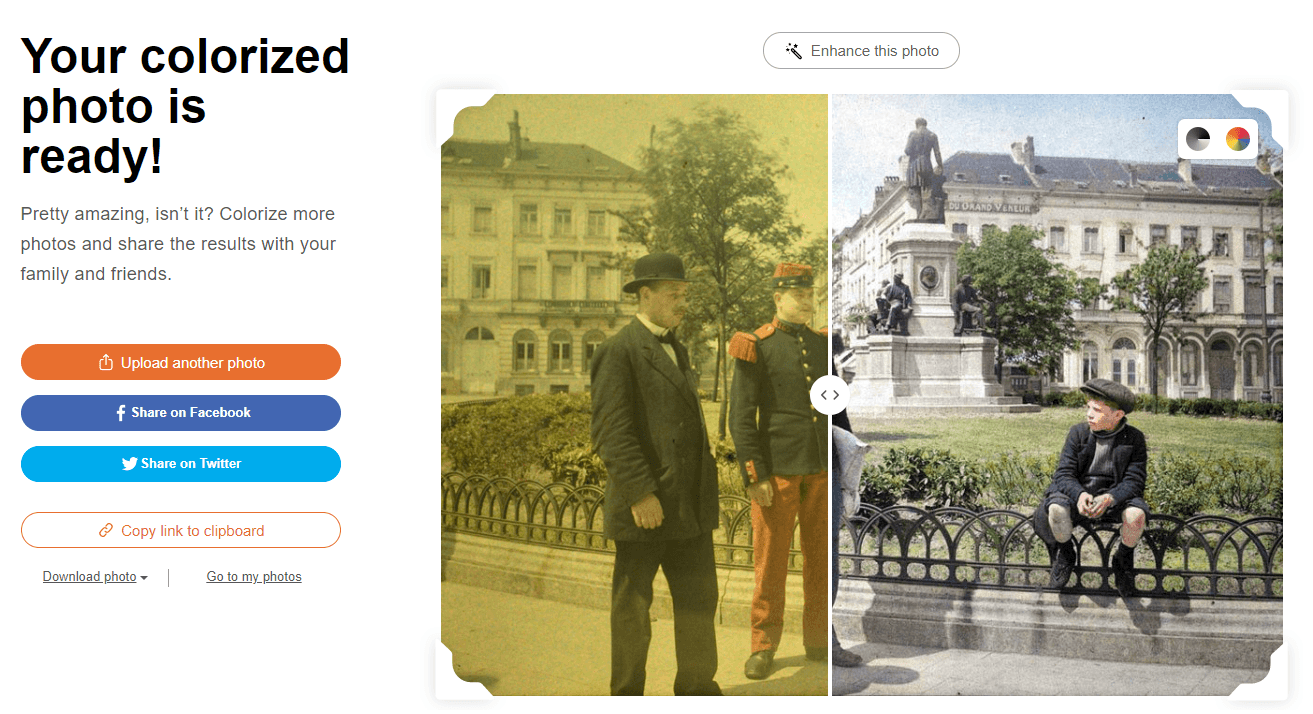
You can drag the slider across the image to see the before and after effect of restoring the colors, or use the icons on the top right to toggle quickly between the two versions.
The original color photo that was uploaded is automatically saved in your photo gallery. Both the original color photo and the color-restored version can be accessed under “My Photos” in the Family Tree tab. The color-restored photo is not added to your albums as a standalone photo. Instead, it piggybacks on the original color photo so it can be accessed from there.
You can combine the power of color restoration and the MyHeritage Photo Enhancer to restore and enhance a photo. The Photo Enhancer will bring blurry photos into focus.
In contrast to MyHeritage In Color™ and the MyHeritage Photo Enhancer, no symbol is added to the bottom left corner of images whose colors were restored. This is because while restoring photos, the algorithm isn’t giving its best guess as to what the original colors may have been, and it doesn’t change the resolution of the photo; rather, it restores the genuine colors of the original photo.
Restoring photos already on MyHeritage
If you already have a MyHeritage account, and have built a family tree, you may have many family photos already on MyHeritage. You can easily restore any color photo that you already have on MyHeritage.
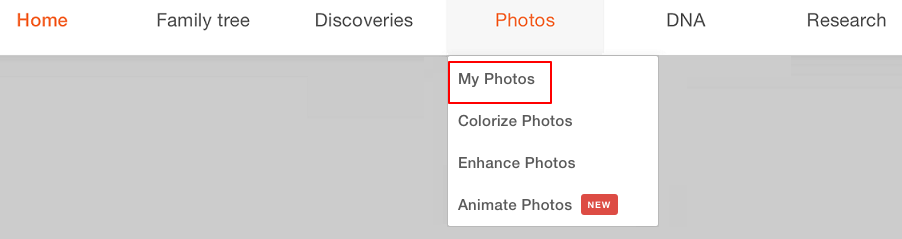
To do so, first select “My Photos” from the Photos tab to access your photos.
Select an album from the list on the left, or stay with the default album “All Media Items.” Then click any color photo on the screen. If the algorithm has identified it as a color photo, the button with the color wheel icon will display the “Restore colors” option.
Once the colors are restored, you’ll see the photo with the slider bar down the center, which you can drag to view the full color-restored image or the original color image.

At any point in this process, while viewing a specific photo, you can also click “Enhance” to enhance the photo and bring it into sharp focus. The order doesn’t matter — you can enhance and restore the photos in whichever order you choose, and you will get the same results.
On the top left of the photo you will see a few different action icons:
Download
You can download either the original photo, the color-restored photo, or a side-by-side comparison of the two.
Delete
You can delete either the original photo or the color-restored photo. When you delete a color-restored photo, the original color photo will still remain on your family site. However, if you delete the original photo, the color-restored version (if one exists) will be deleted as well.
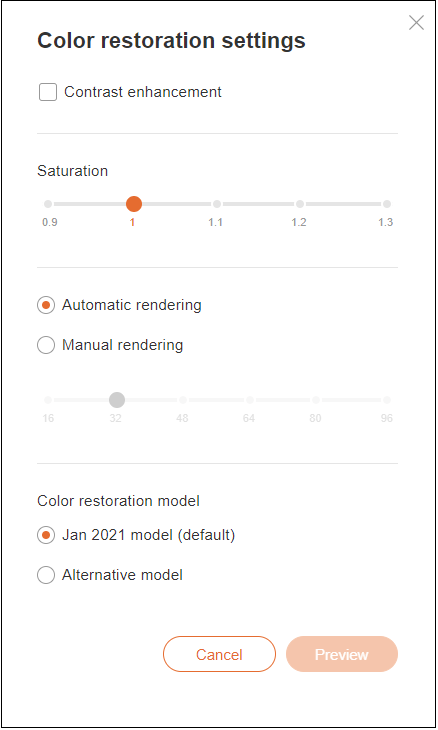
Settings
Here you’ll find the color restoration settings. You’ll see that the current default model is the January 2021 model. While we believe that this model will give the best results, there are some cases where the alternative model produces better results. You can adjust the contrast enhancement, saturation, and rendering options to fine-tune your results.
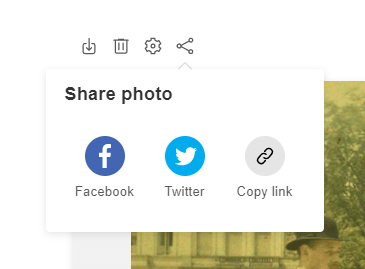
Share
Share your color-restored photo on Facebook or Twitter, or copy the link to share elsewhere.
Restoring colors in photos that were previously colorized
If you colorized a photo that was taken in color (a process which simulates the colors and may get them wrong) before the color restoration feature was released, you can still restore its original colors. Simply upload the photo again to MyHeritage. If the photo was originally taken in color, you’ll be given the option to restore its colors.
Alternatively, you can also visit the My Photos section of your family site, find the photo in your photo gallery, and click it. You’ll need to delete the colorized version of the photo by clicking the trash icon and selecting “Colorized photo” (or “Enhanced colorized photo” if the photo was also enhanced). After the page reloads, the “Restore colors” button should appear. Click it to restore the colors in the photo. This will work only if the original photo is indeed a color photo.
Restoring colors using the MyHeritage mobile app
You can also restore photos using the very latest version of the MyHeritage mobile app. You can download it for free from the App Store or Google Play. If you already have the app, you’ll need to update it first to make sure you’re using the latest version.
Visit the Photos section to see all of your uploaded photos.
Select any faded color photo from your gallery, and tap the color icon to restore the colors. The same icon lets you colorize or restore colors, depending on the photo you use.
The process takes a few seconds. Once the colors have been restored, you’ll see the photo with the slider bar down the center, which you can drag to view the full before or after photo.
Tap the icons for more options: tag the photo, edit or view photo details, save the original, color-restored, or comparison photo to the library, or delete the original or color-restored photo. If you delete the original photo, the color-restored version will be deleted as well.
How much does it cost?
Users who have a Complete plan with MyHeritage can restore the colors in an unlimited number of photos.
Other users can colorize several photos and restore the colors in several additional photos for free. To colorize or restore more photos, a subscription is needed. Non-subscribers will notice a watermark of the MyHeritage logo on the bottom right of their photos, while Complete subscribers will be able to produce colorized and color-restored photos that are logo-free.
Summary
Color restoration with MyHeritage In Color™ will change the way you look at your old color photos. You can have the time of your life restoring the colors in your photos, reminiscing, and sharing the rejuvenated photos with your loved ones. Enjoy!